Customise a Theme
What you'll learn
After going through this tutorial, you will have learnt how to:
- set up your local development environment
- clone an existing fynd platform theme.
- preview changes made to your local code
- push your theme’s code to the application
- prepare your theme for submitting on themes marketplace
Pre-requisite
Before you begin creating a theme, you need:
- To create or have access to a Partner account on Fynd Partners
- To have at least 1 development account or live account available in your partner organization. Click here to know how to create development account or get access to a live account through your partner panel. It is recommended to use development account for this tutorial.
- FDK-CLI latest version.
- Node.js v16.19.
- Git installed.
- ReactJS.
Login your partner account into FDK/CLI
To run this step you need to complete pre-requisite [fdk/cli] pre-requisite partners and pre-requisite company and sales channel.
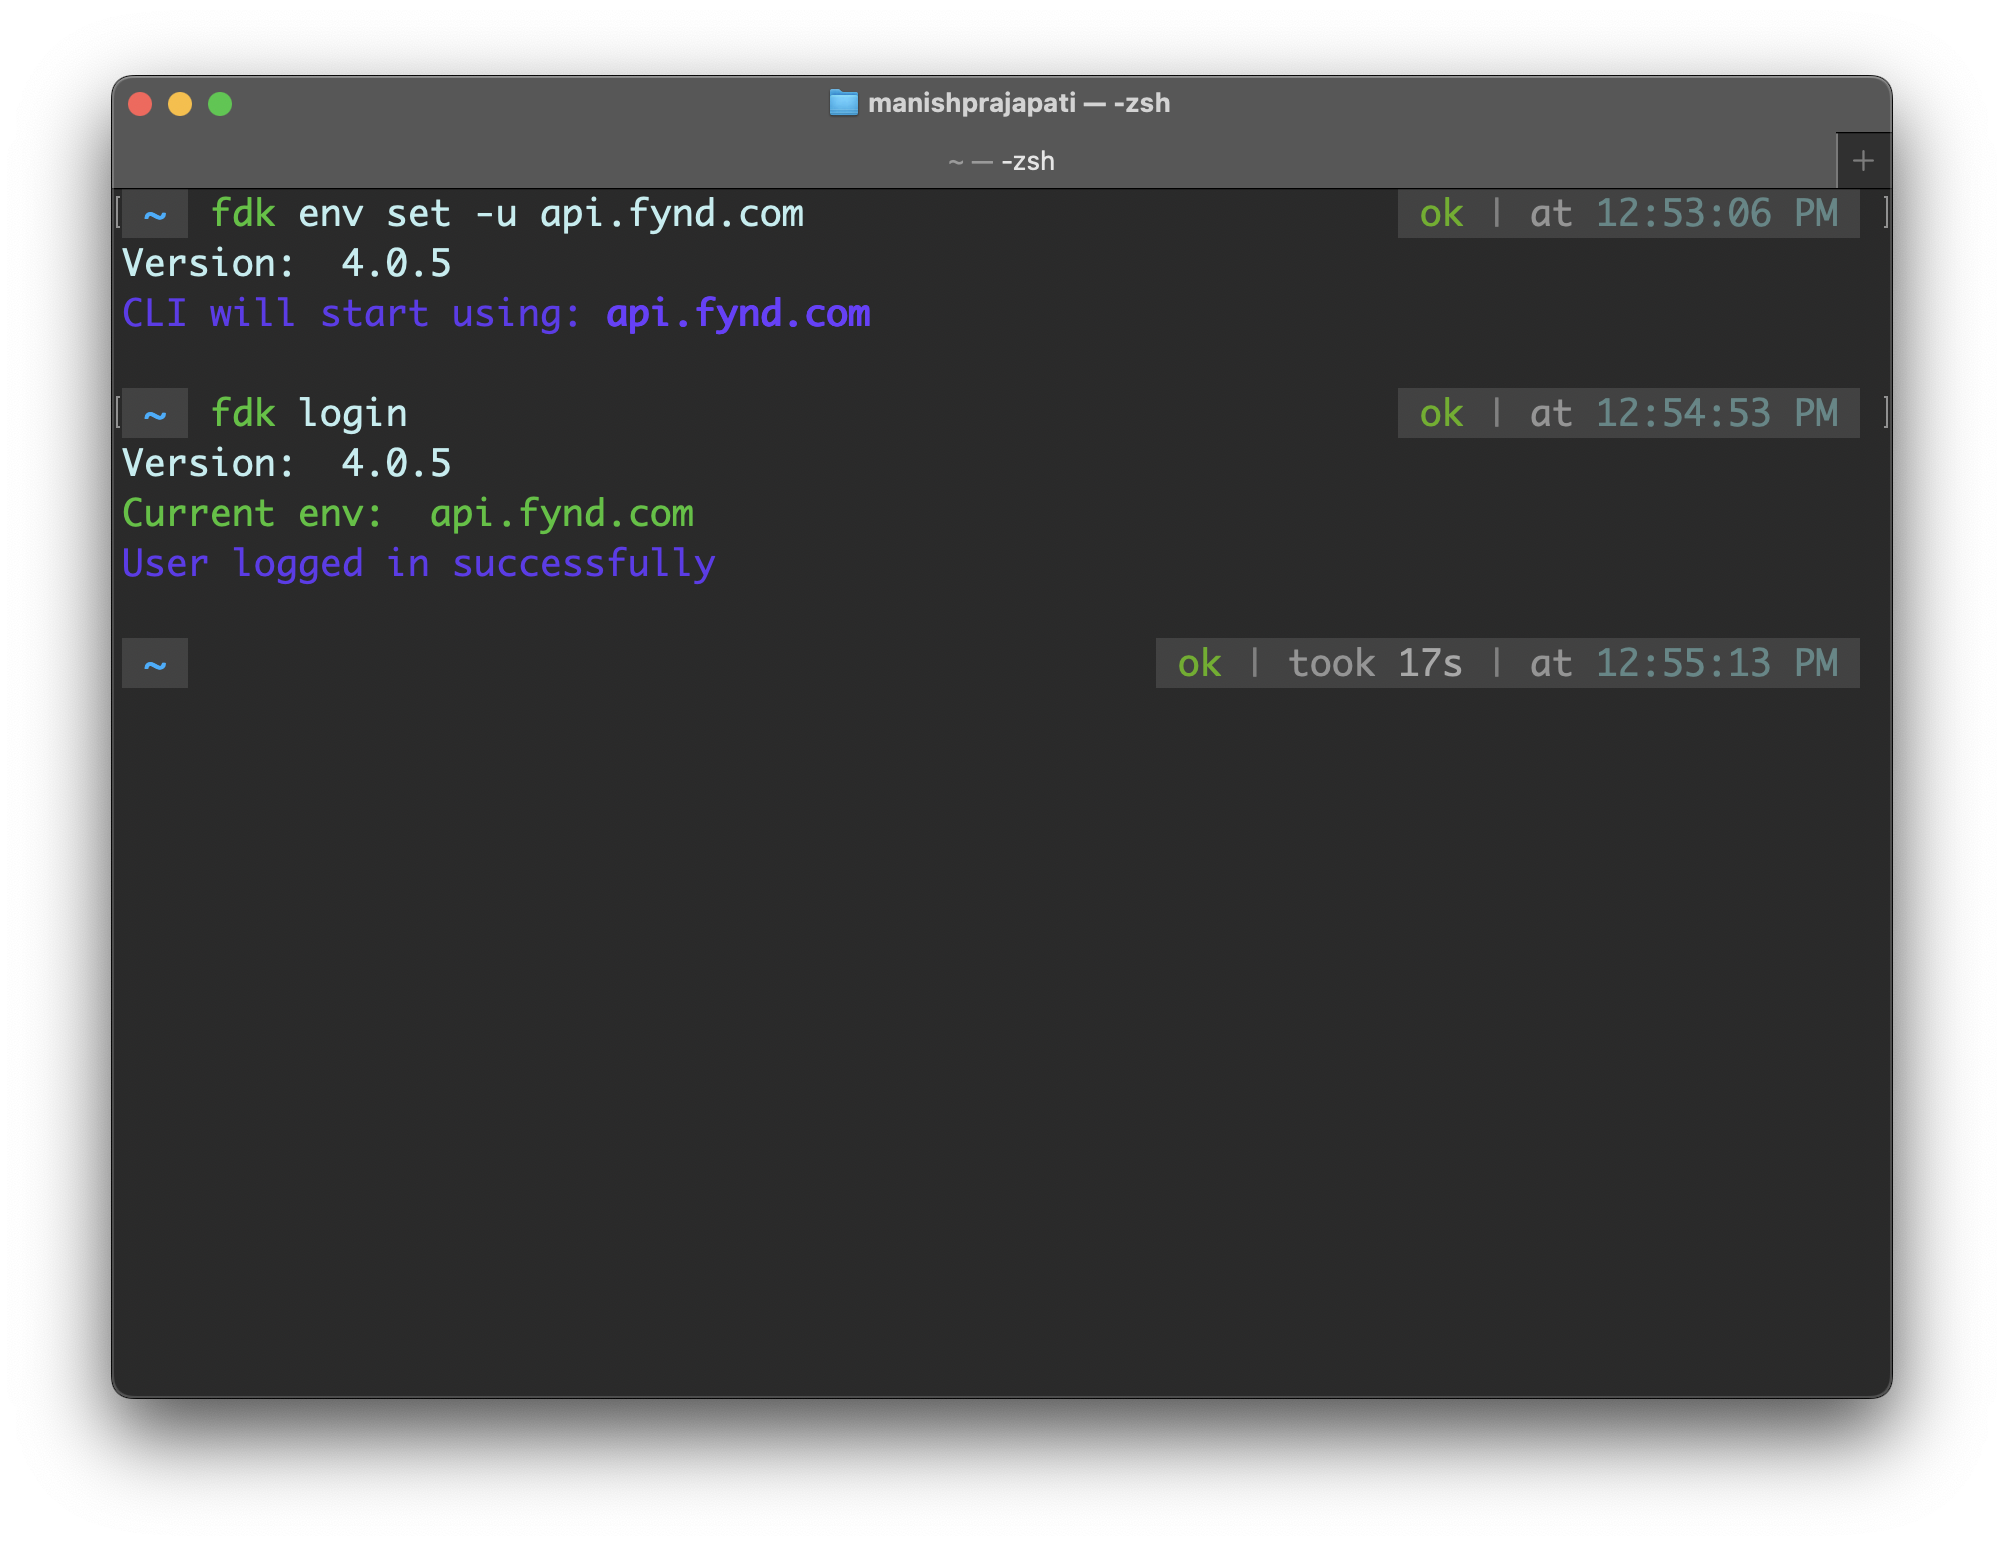
Step 1: Logging into Partner's Account
Run the following command in the terminal to log into your partner's account of the specified environment:
fdk login
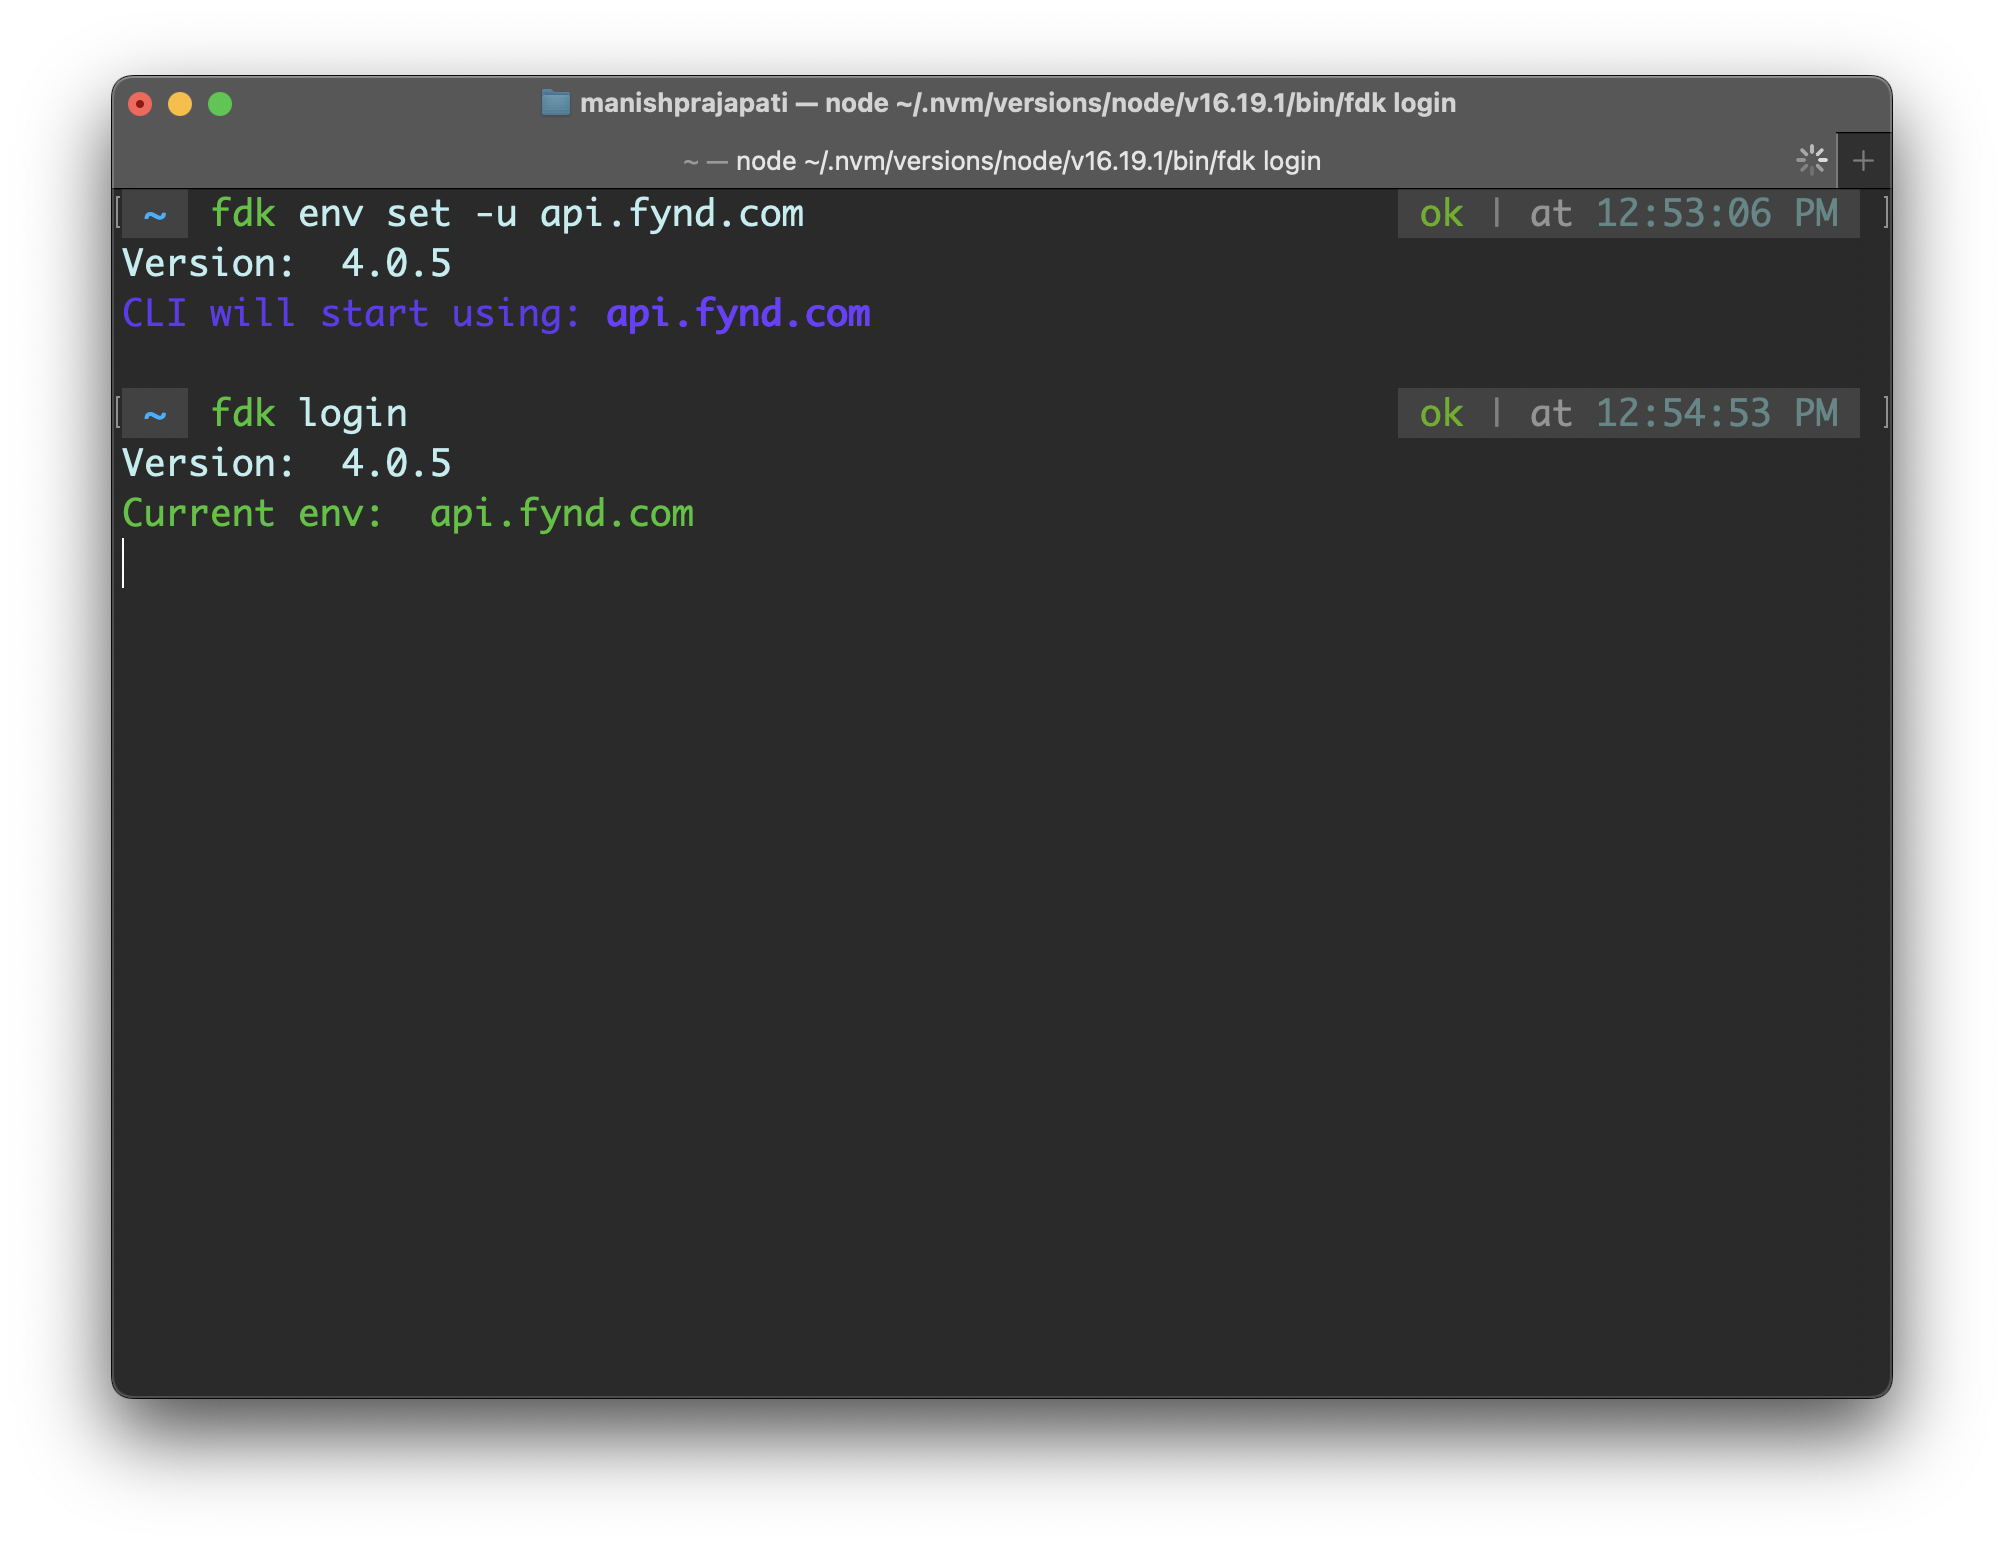
After running the login command, you will be redirected to the homepage of the partner's panel for that specific environment.
Note: If you want to use a different environment (cluster) for theme development, you can change the active environment by using the following command:
fdk login --host your-partner-domainThis command will change the active environment to the provided cluster host. For example, if your partner account exists at
partners.fynd.com, you should use:fdk login --host partners.fynd.comThis will set the active environment to the Fynd cluster.
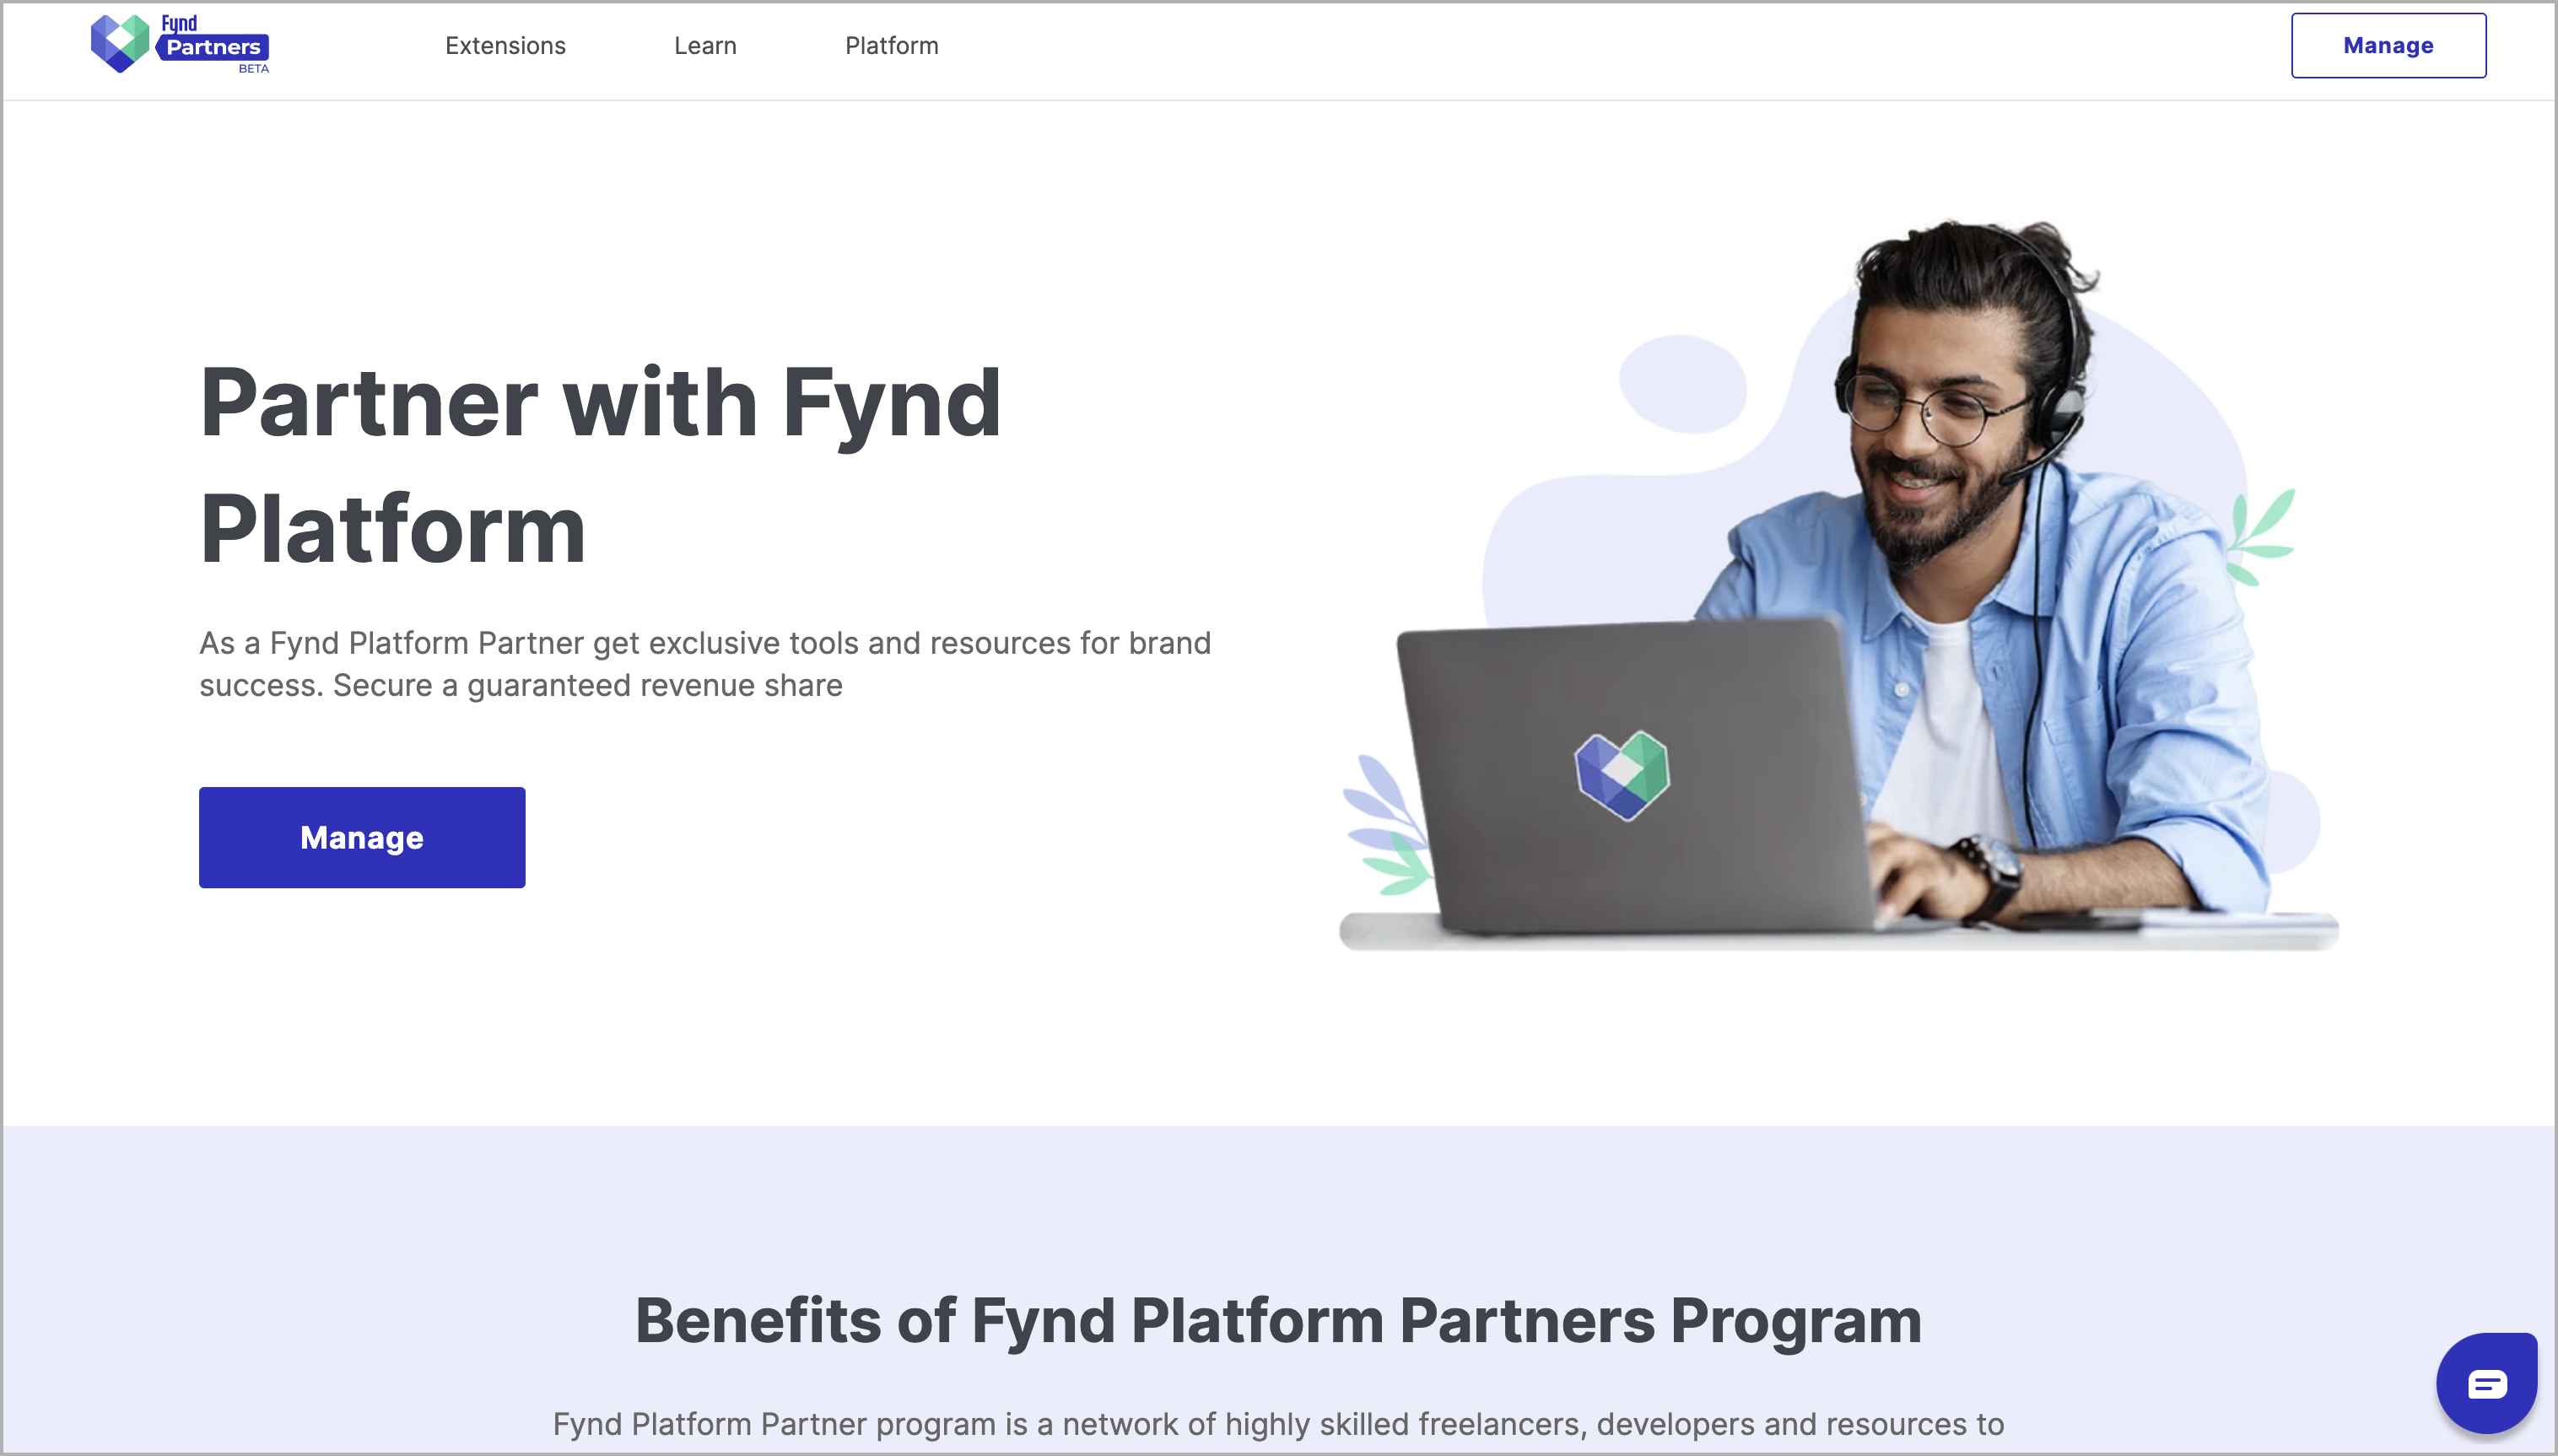
Step 2: Organization Selection
Click Manage button at the top of the page, which will redirect you to the organization select page. Here, you will see a list of organizations.
Step 3: Selecting the Organization
- Choose the organization that grants you access to the company and sales channel.
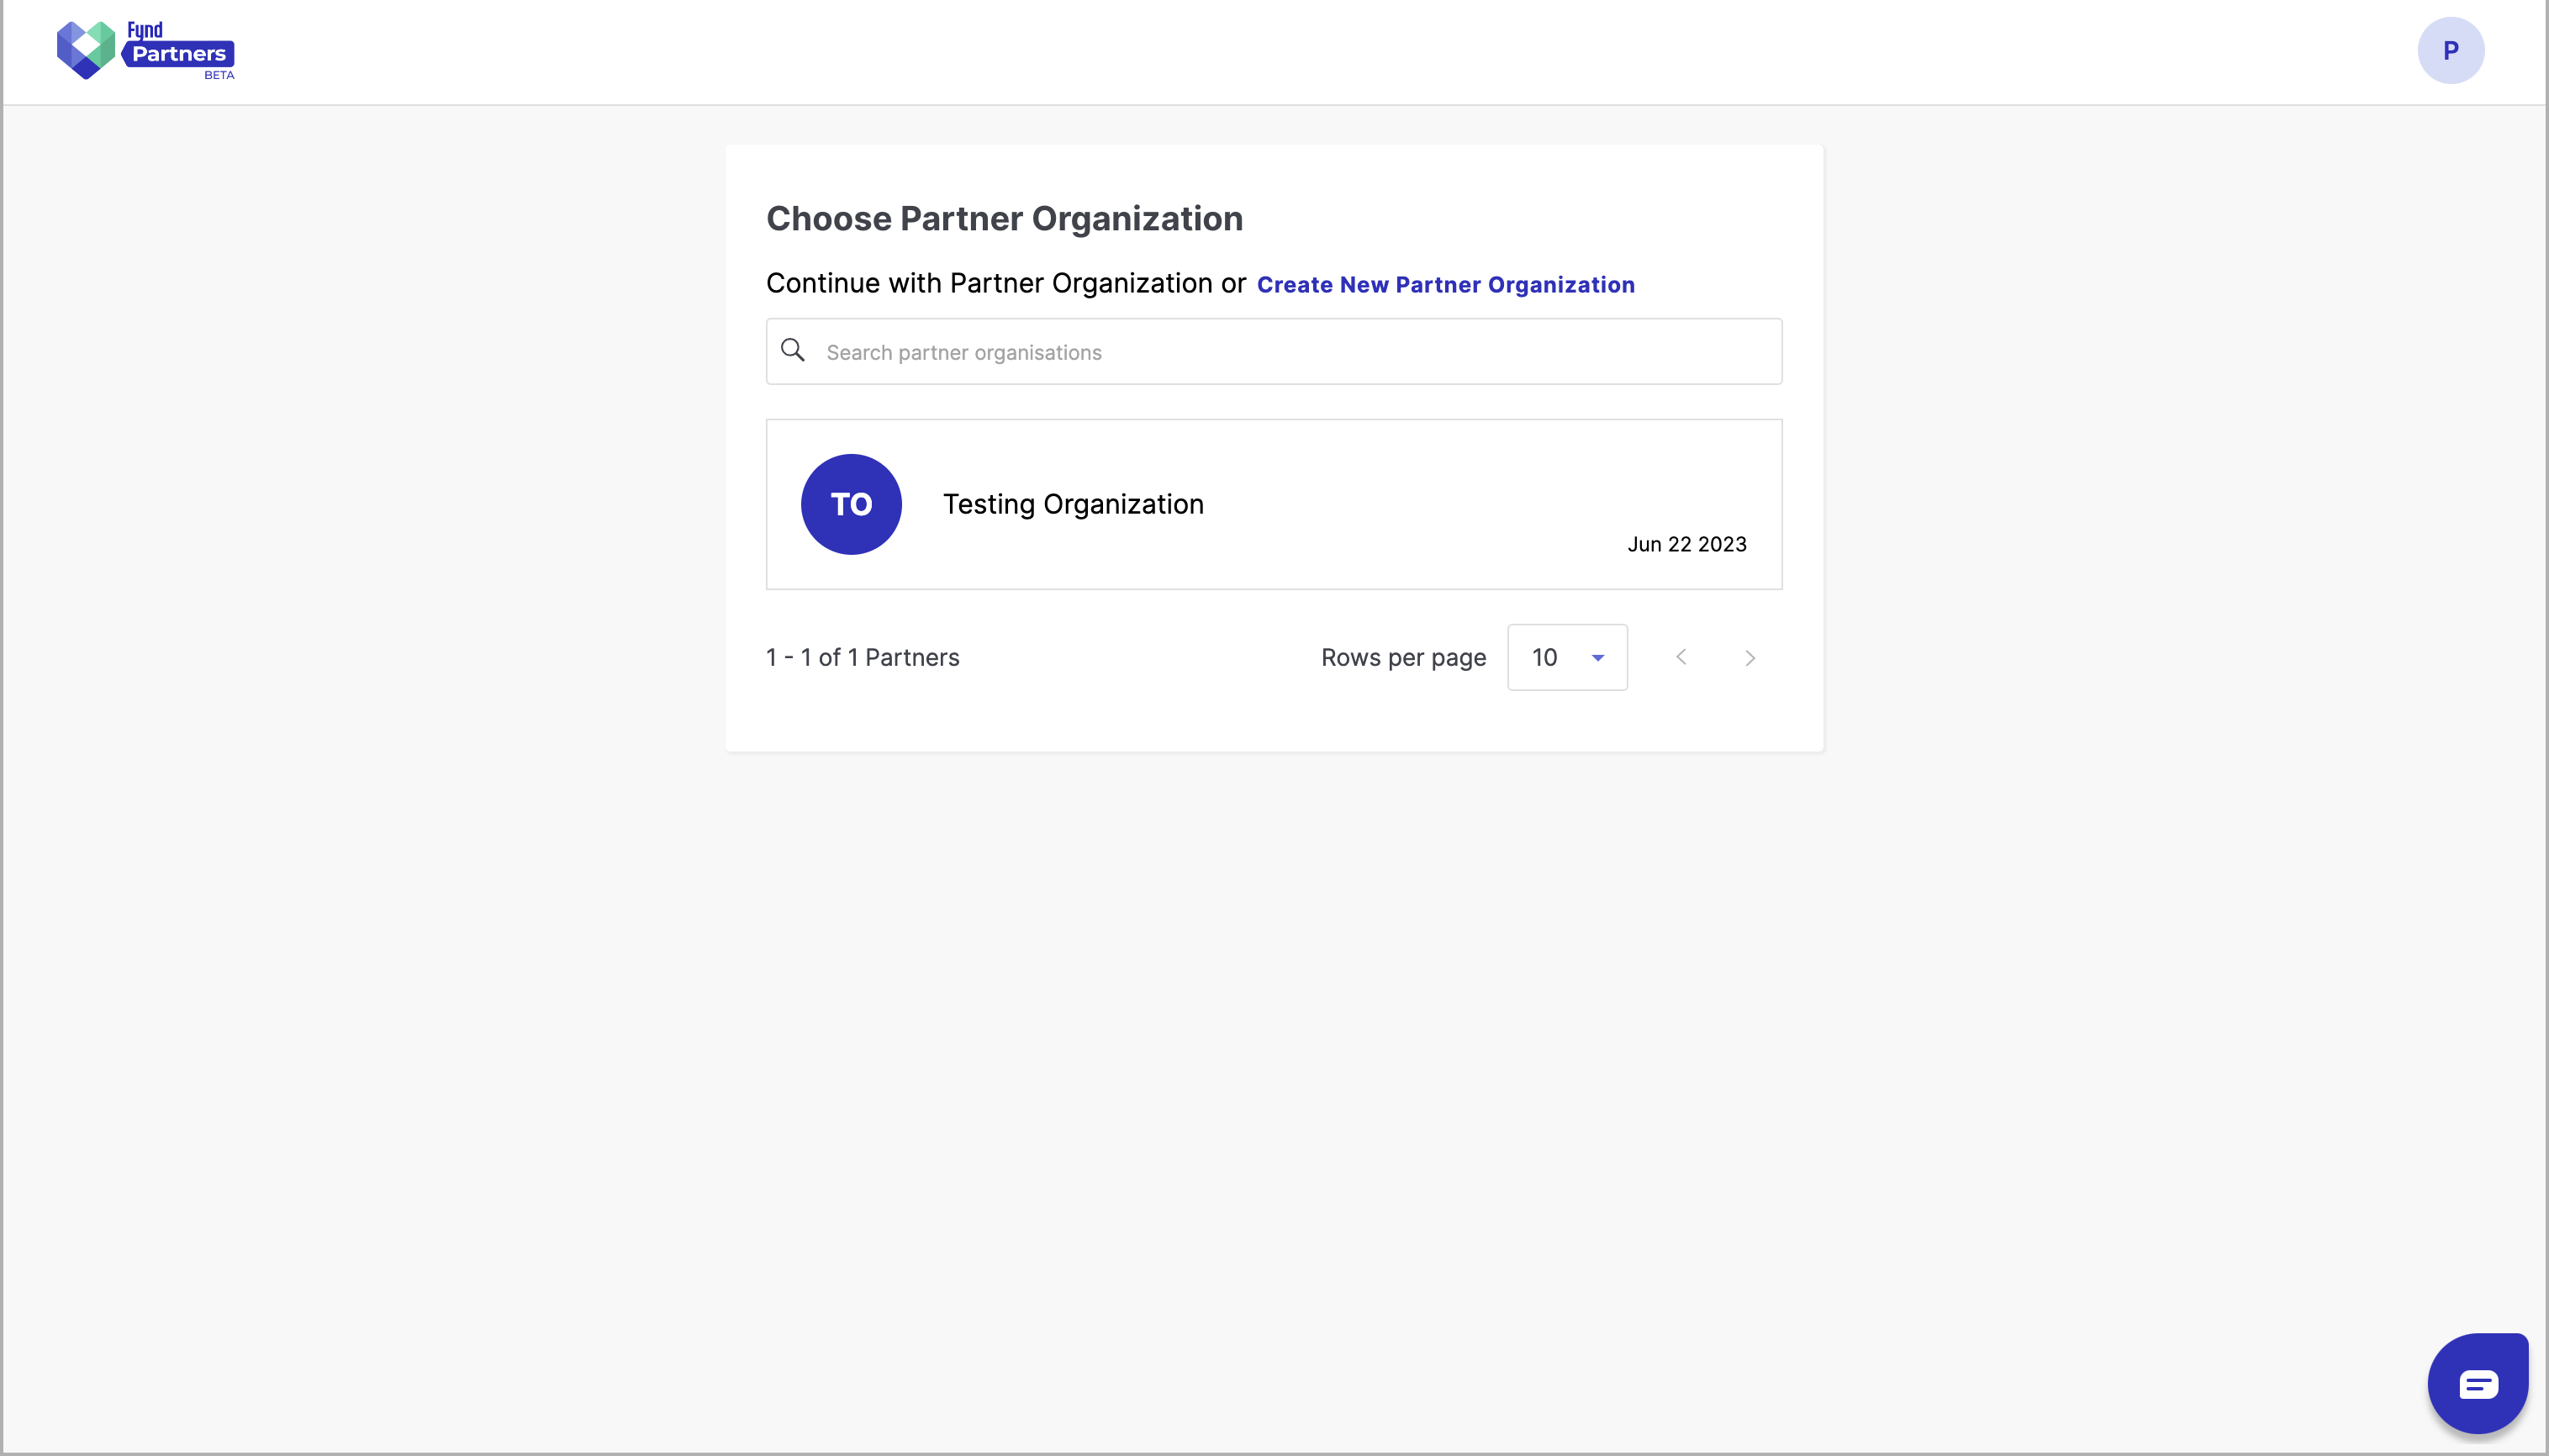
- After selecting the organization, you will be redirected to the successful login page in your browser.
- Verify in your terminal that you have successfully logged in to the FDK/CLI.
Step 4: Verification of Successful Login (Part 1)
- You will select the organization in which you have access for company and sales channel.
- As soon as you select the organization you will be redirected to the succesfull login page in browser and you can check you terminal that you have been succesfully logged in inside fdk/cli.
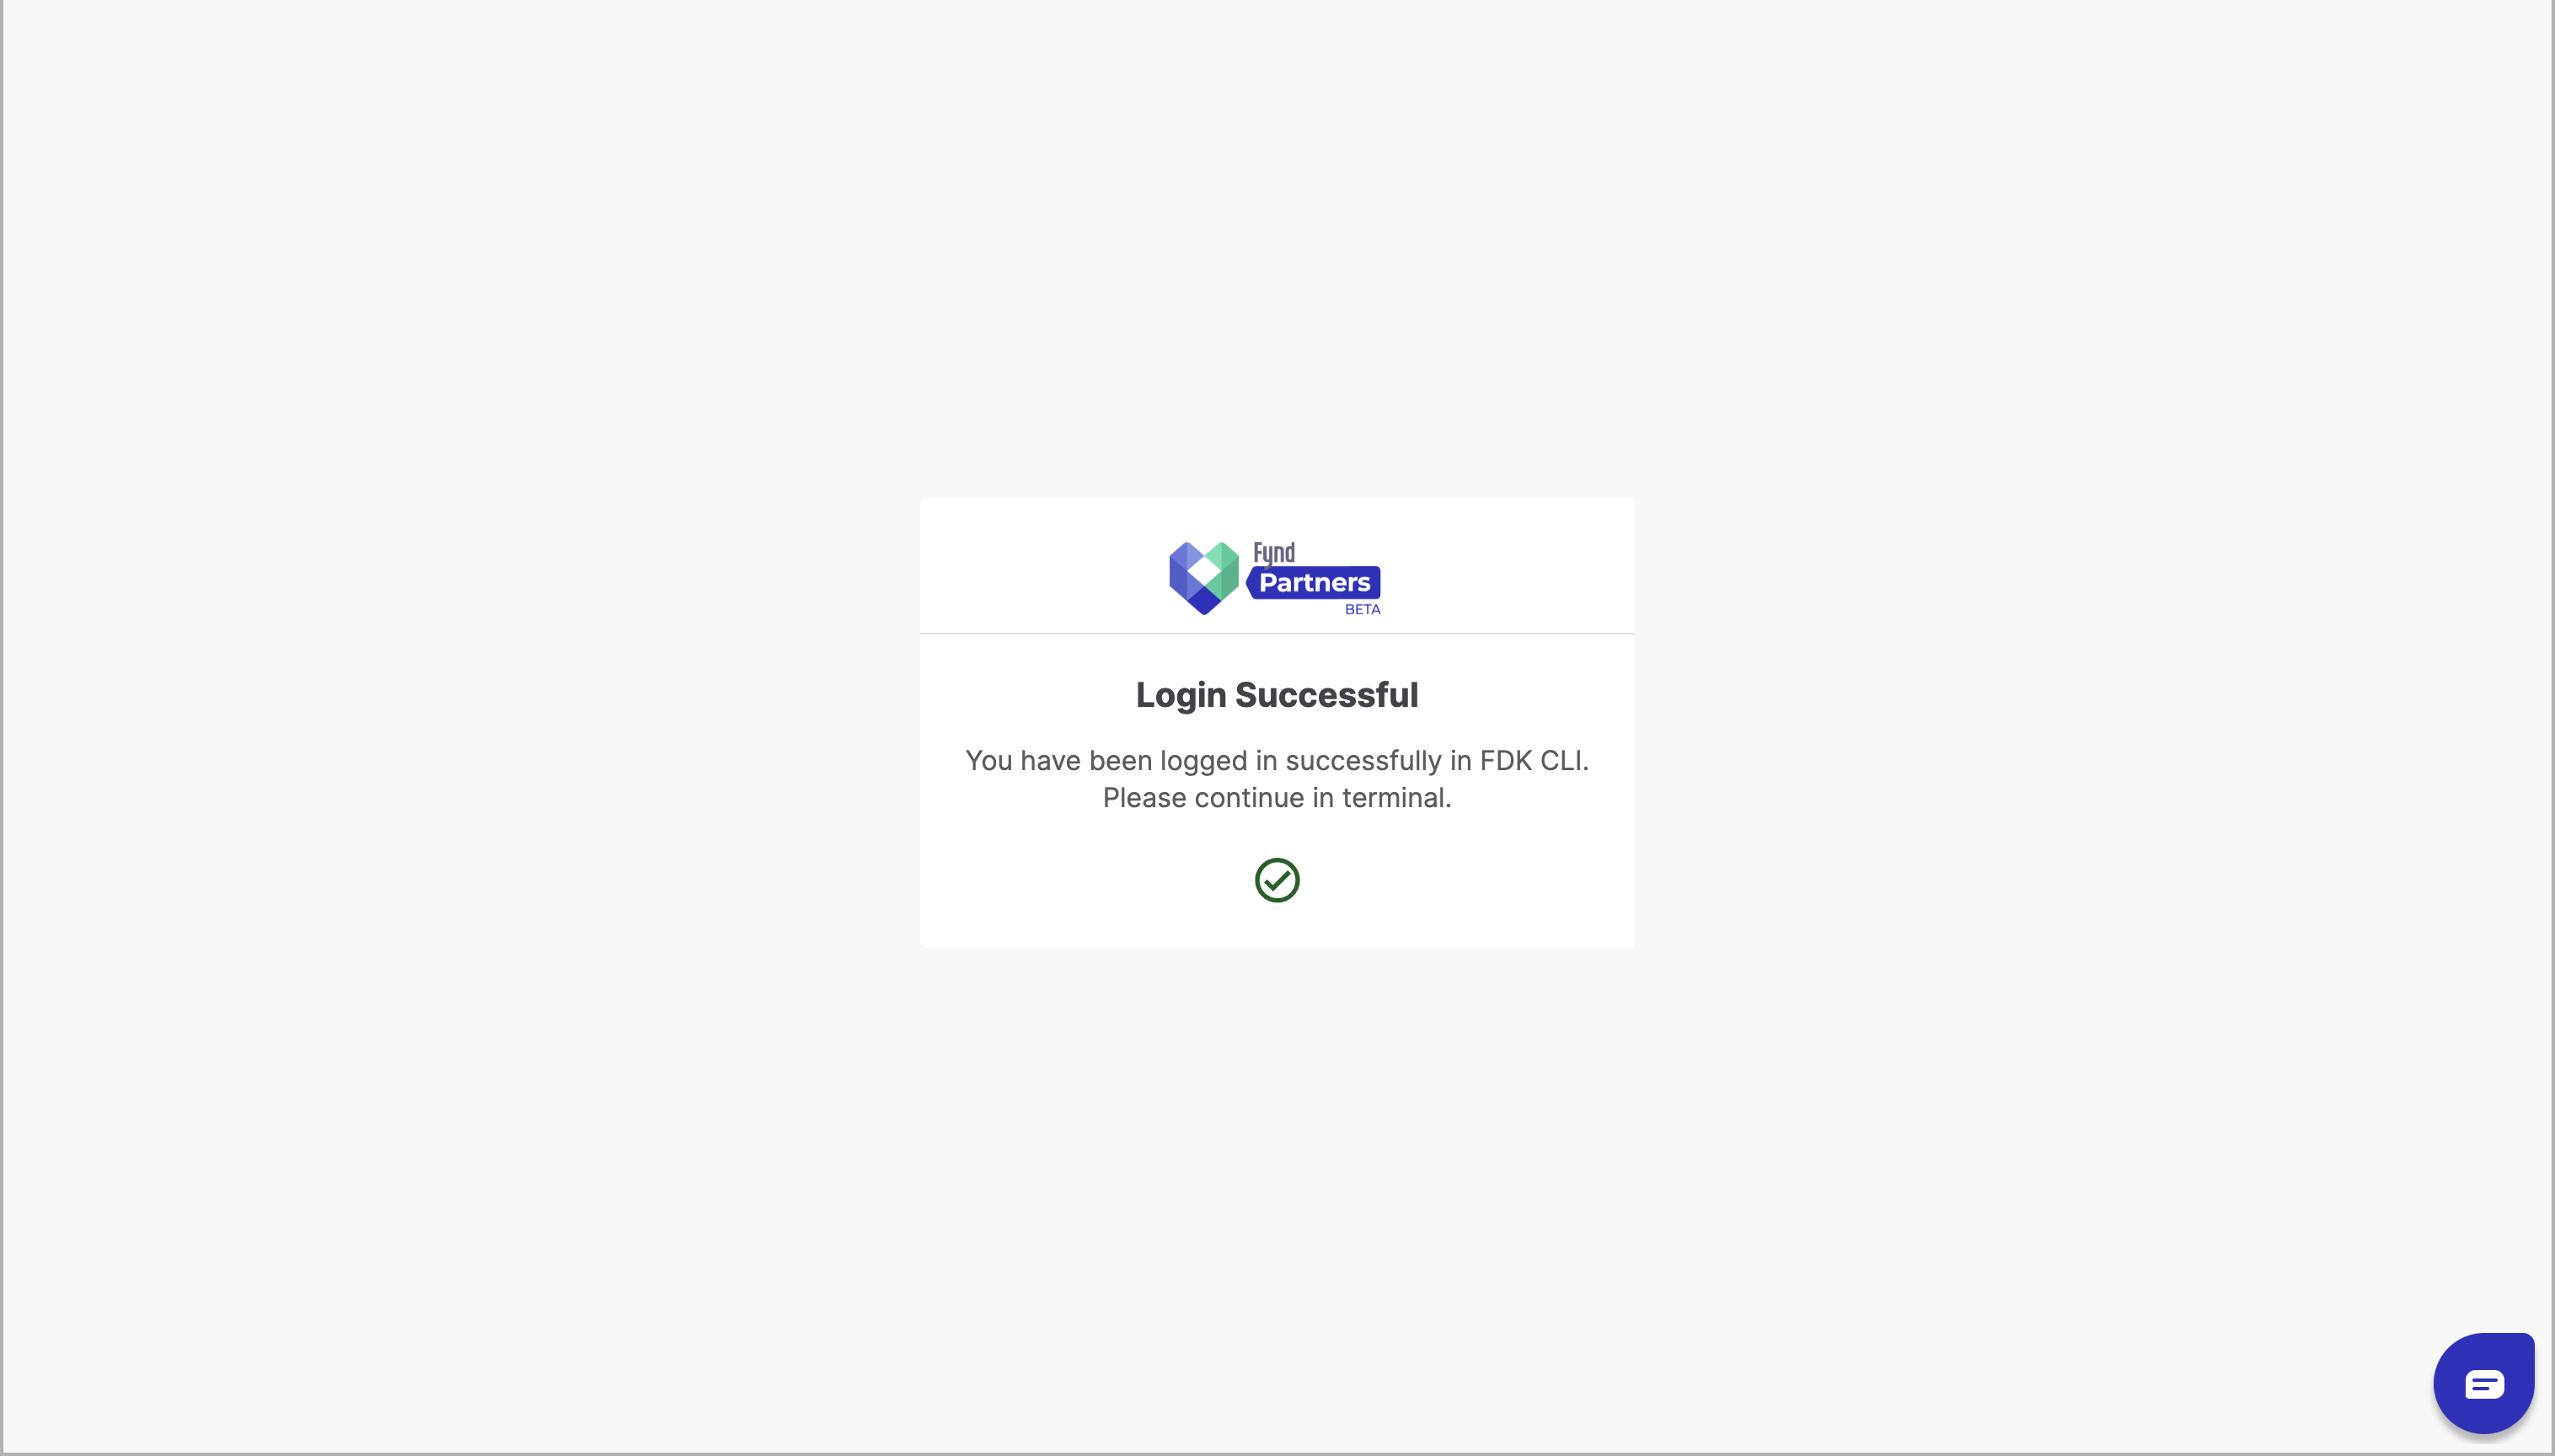
Step 4: Verification of Successful Login (Part 2)
- To verify if you are logged in to the FDK/CLI, run the following command in your terminal:
fdk user
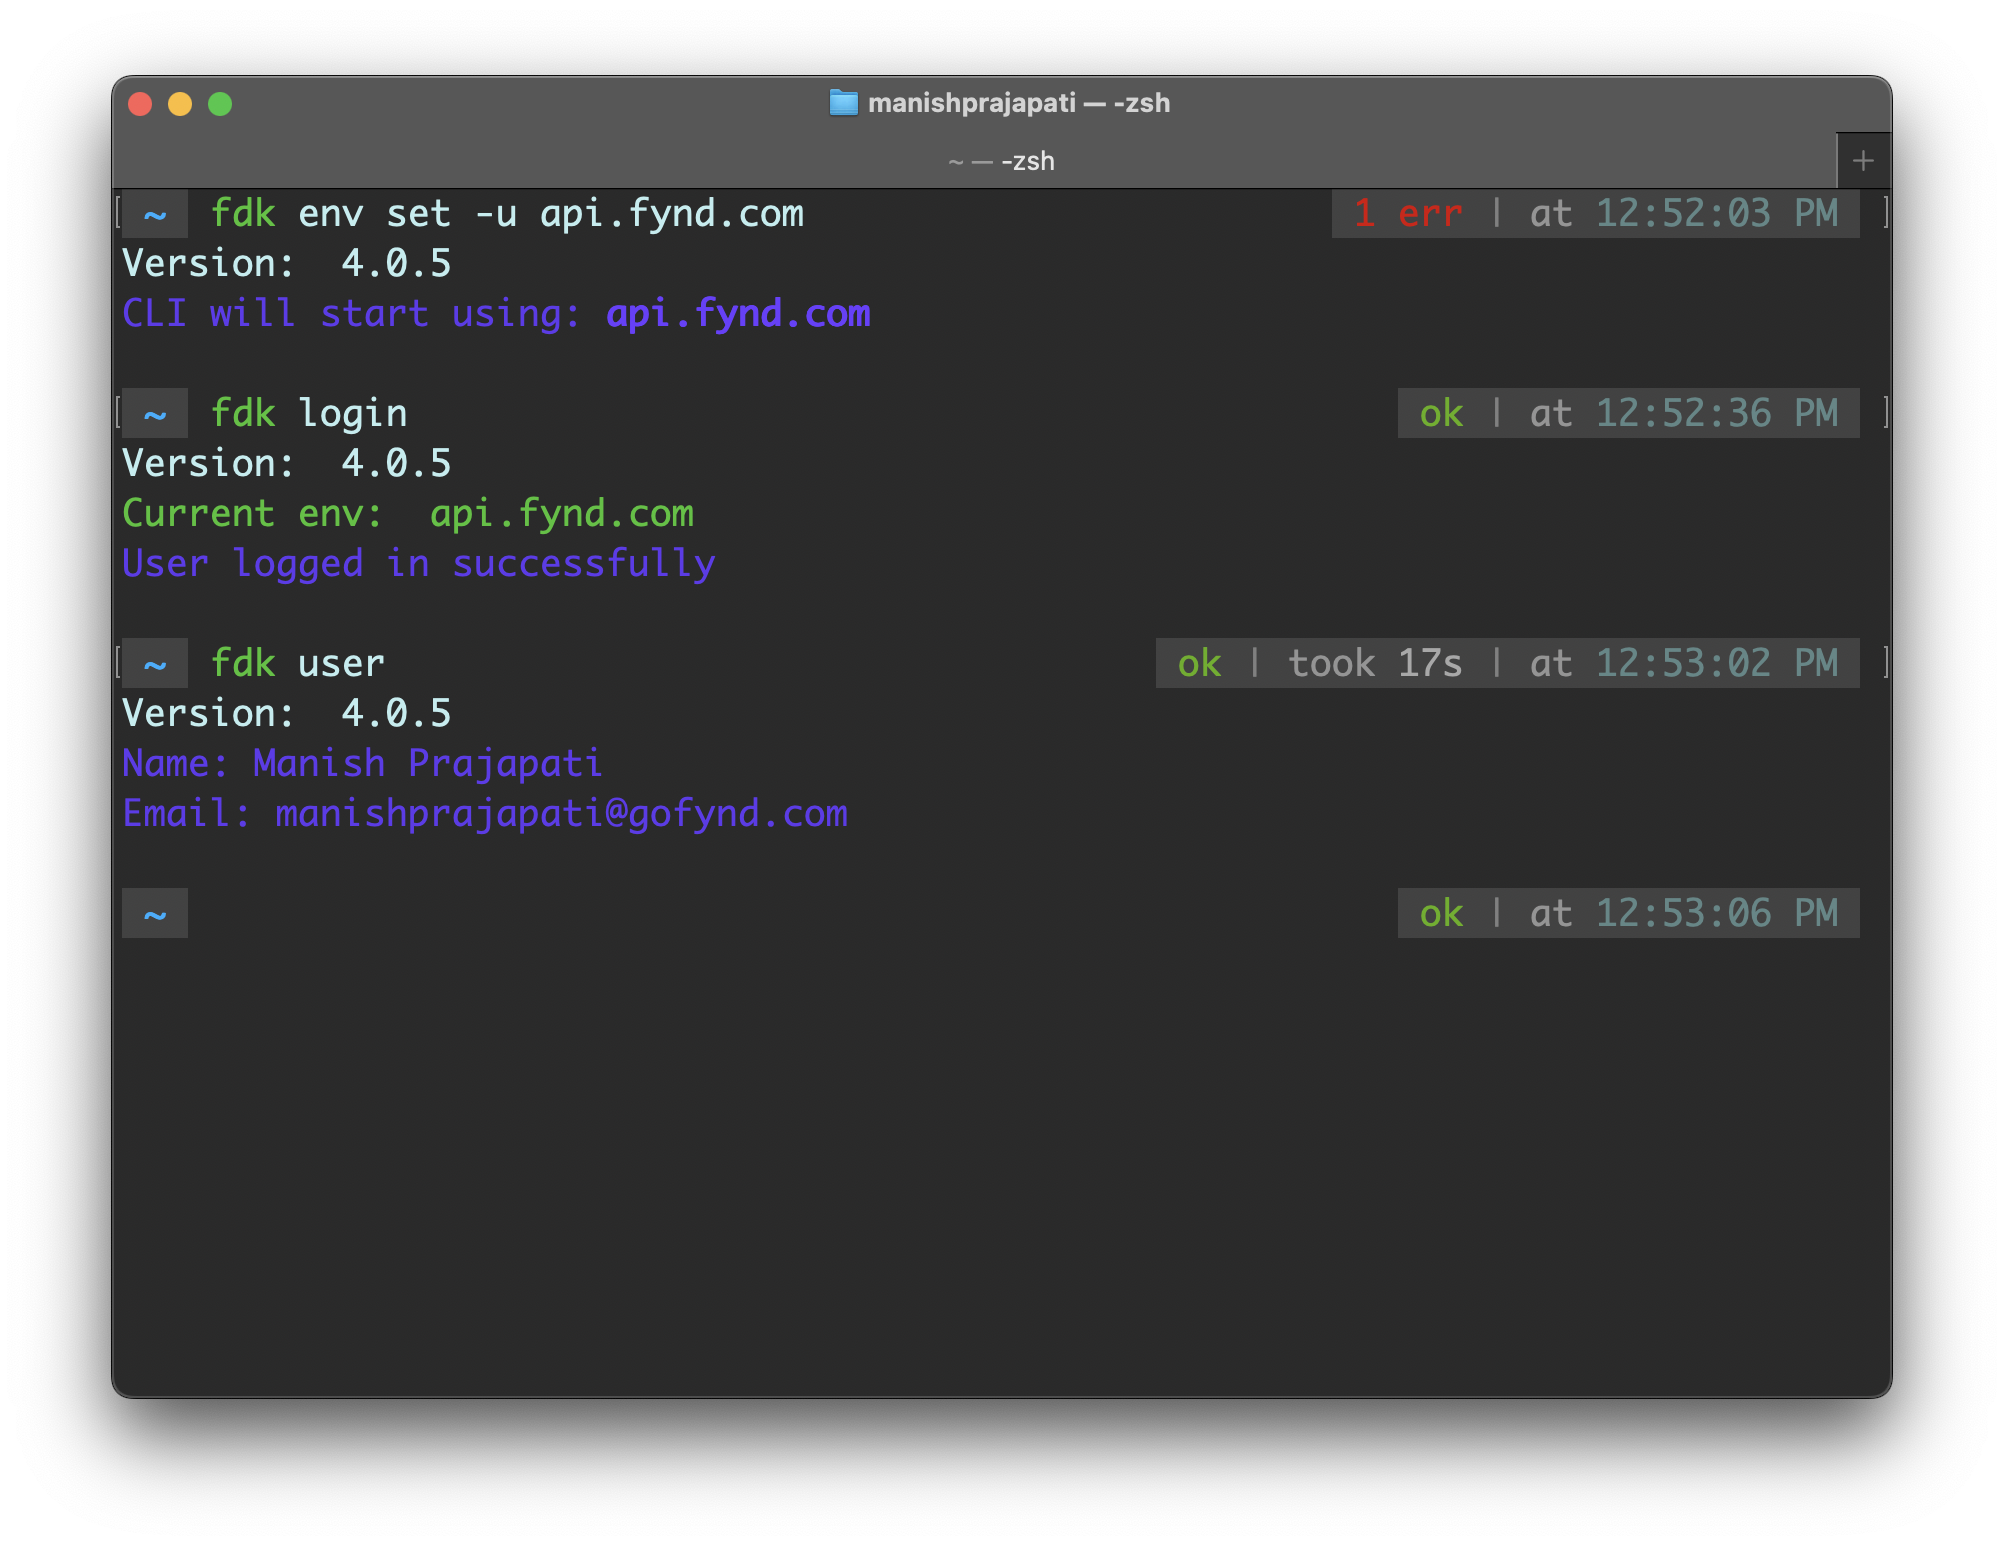
- If you have successfully logged in, the command will return the name and email of the user.
- If not, it will prompt you to log in.
Initialize Exisiting theme (Marketplace theme or Private Theme)
Before creating a theme, ensure that you are logged into the terminal using the instructions provided in Theme Marketplace Documentation.
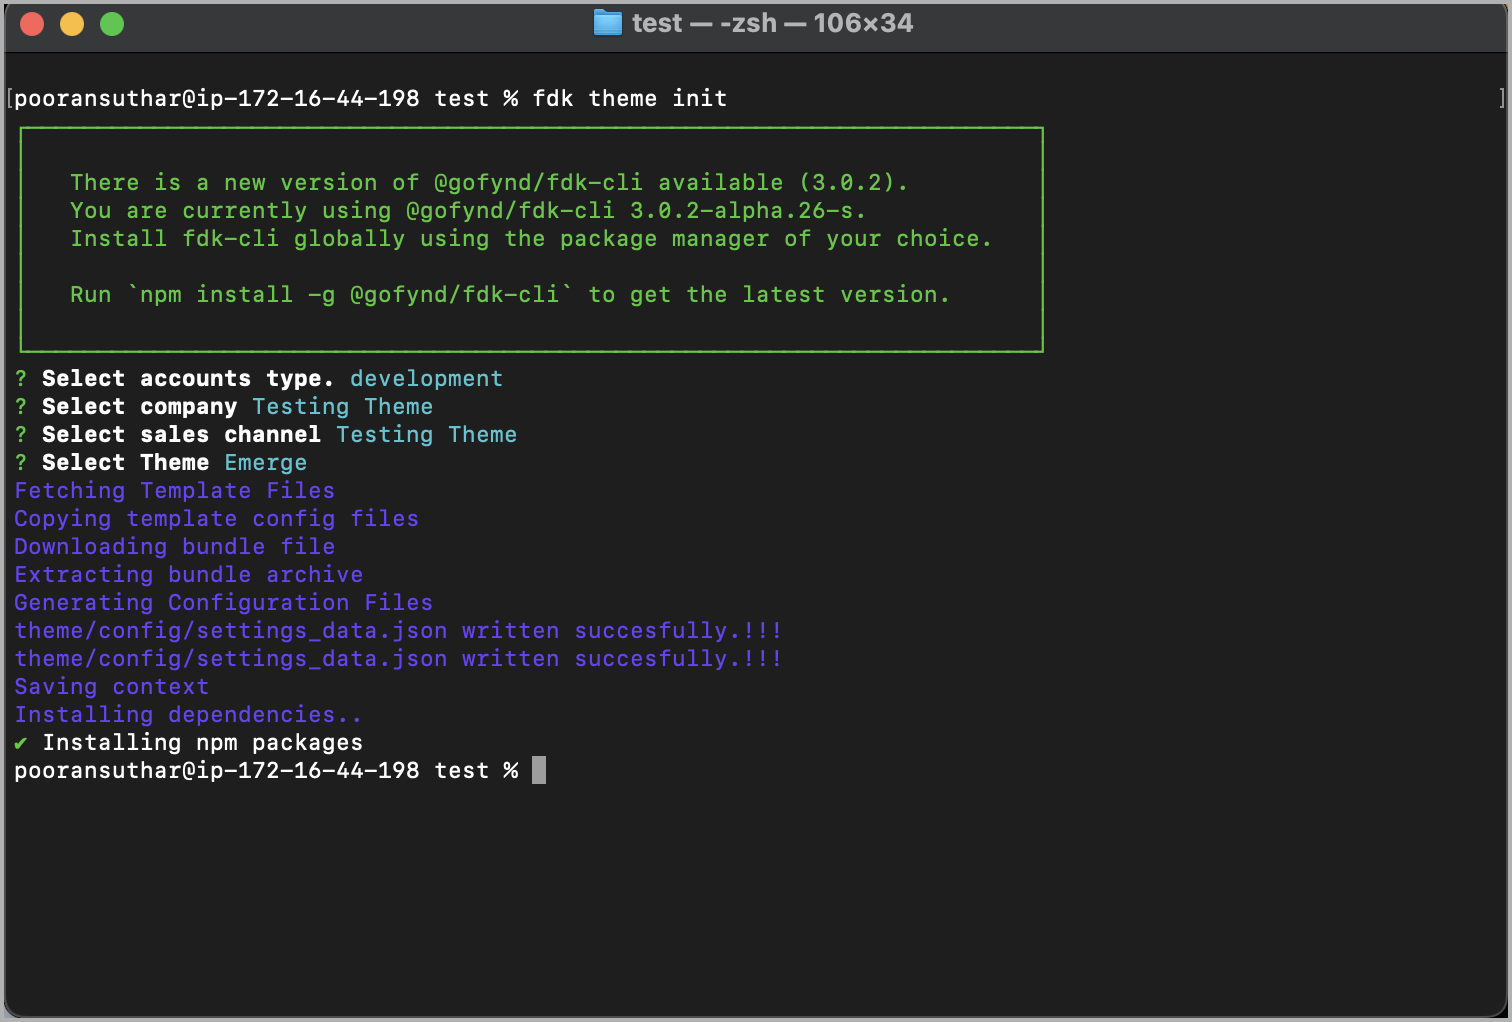
Step 1: Theme Initialization
- Once logged in, execute the following command in the FDK CLI terminal to initialize your existing theme:
fdk theme init
Step 2: Select Account Type
- Next, choose the type of account from which you want the theme to be initialized: development account or live account.
Step 3: Company and Sales Channel Selection
- After selecting the account type, proceed to select the company.
- Once the company is selected, choose the desired sales channel.
- Finally, select the code of the theme you wish to initialize from the available options.
Edit the Initialized Theme
Before editing a theme, make sure you have completed the previous step of Initializing a Marketplace theme or Private theme.
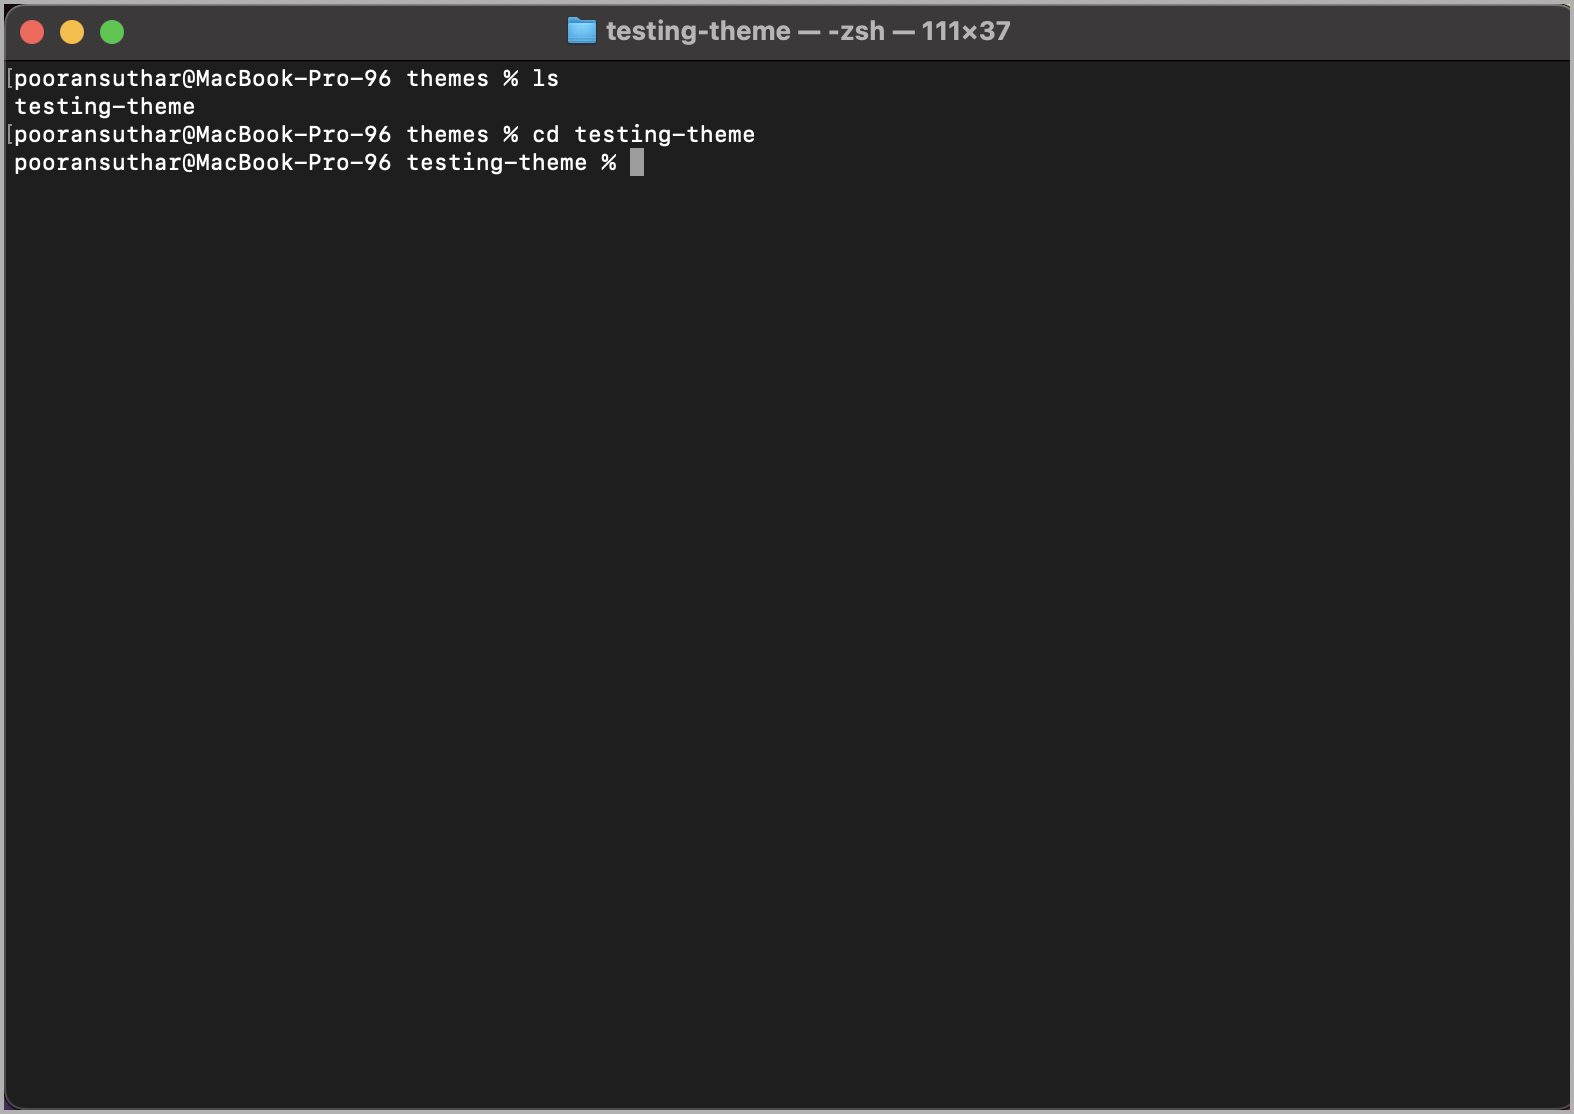
Step 1: Access the Theme Directory
- After creating a theme, run the following command in your terminal to list all available files and folders:
ls
- Locate the folder with the name of the initialized theme. Use the following command to navigate into that folder:
cd theme-name
Step 2: Serve the Theme Locally
- Once inside the theme directory, run the following command to serve the theme locally and verify if it is running correctly:
fdk theme serve
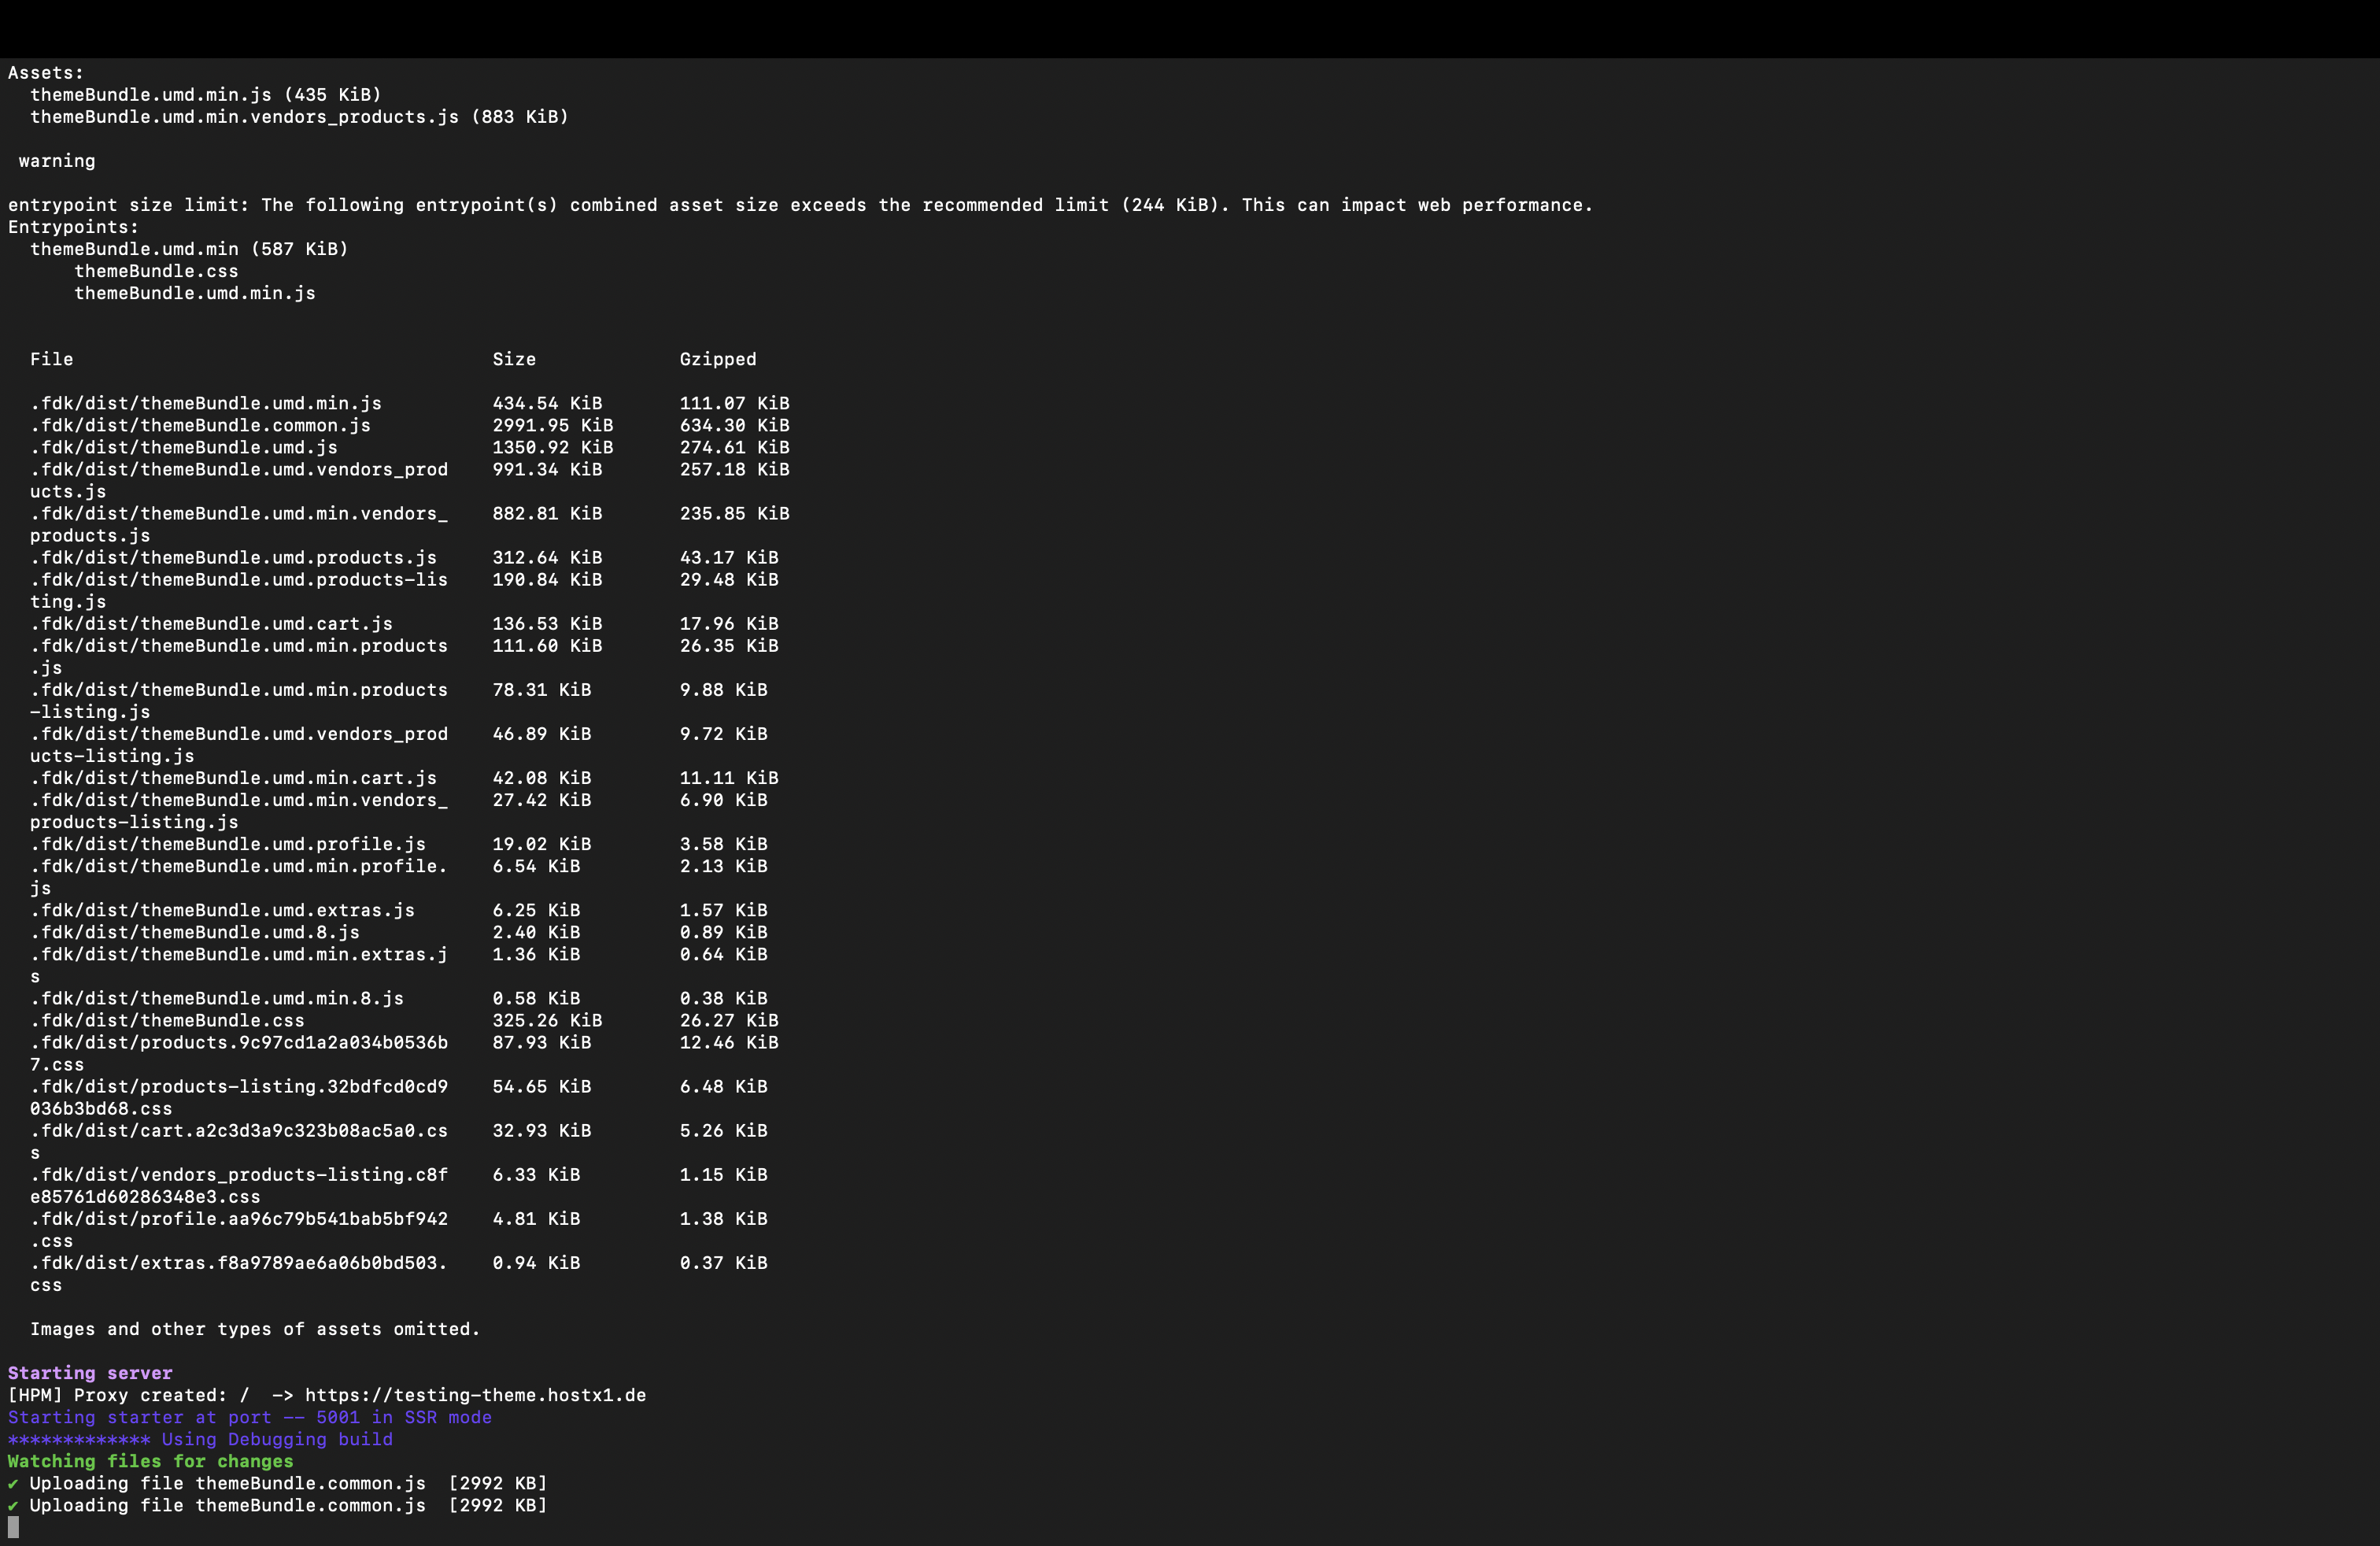
- The theme will be previewed at
localhost:5001. Note that the port number may vary based on availability during the theme serve command.

- Check all the files and folders within the theme-folder to see the predefined theme's code and assets.
Step 3: Add a New Heading to the Home Page
-
Locate the Home Page Code by navigating to
theme-folder > theme > pages > home.jsx. -
Add the following code snippet for the new heading inside the Home Page:
<!— Your new heading code here -->
- Once the code is added, it will automatically compile, and the new changes will be reflected in the local preview if the
fdk theme servecommand is running. If not, you can run the command again.
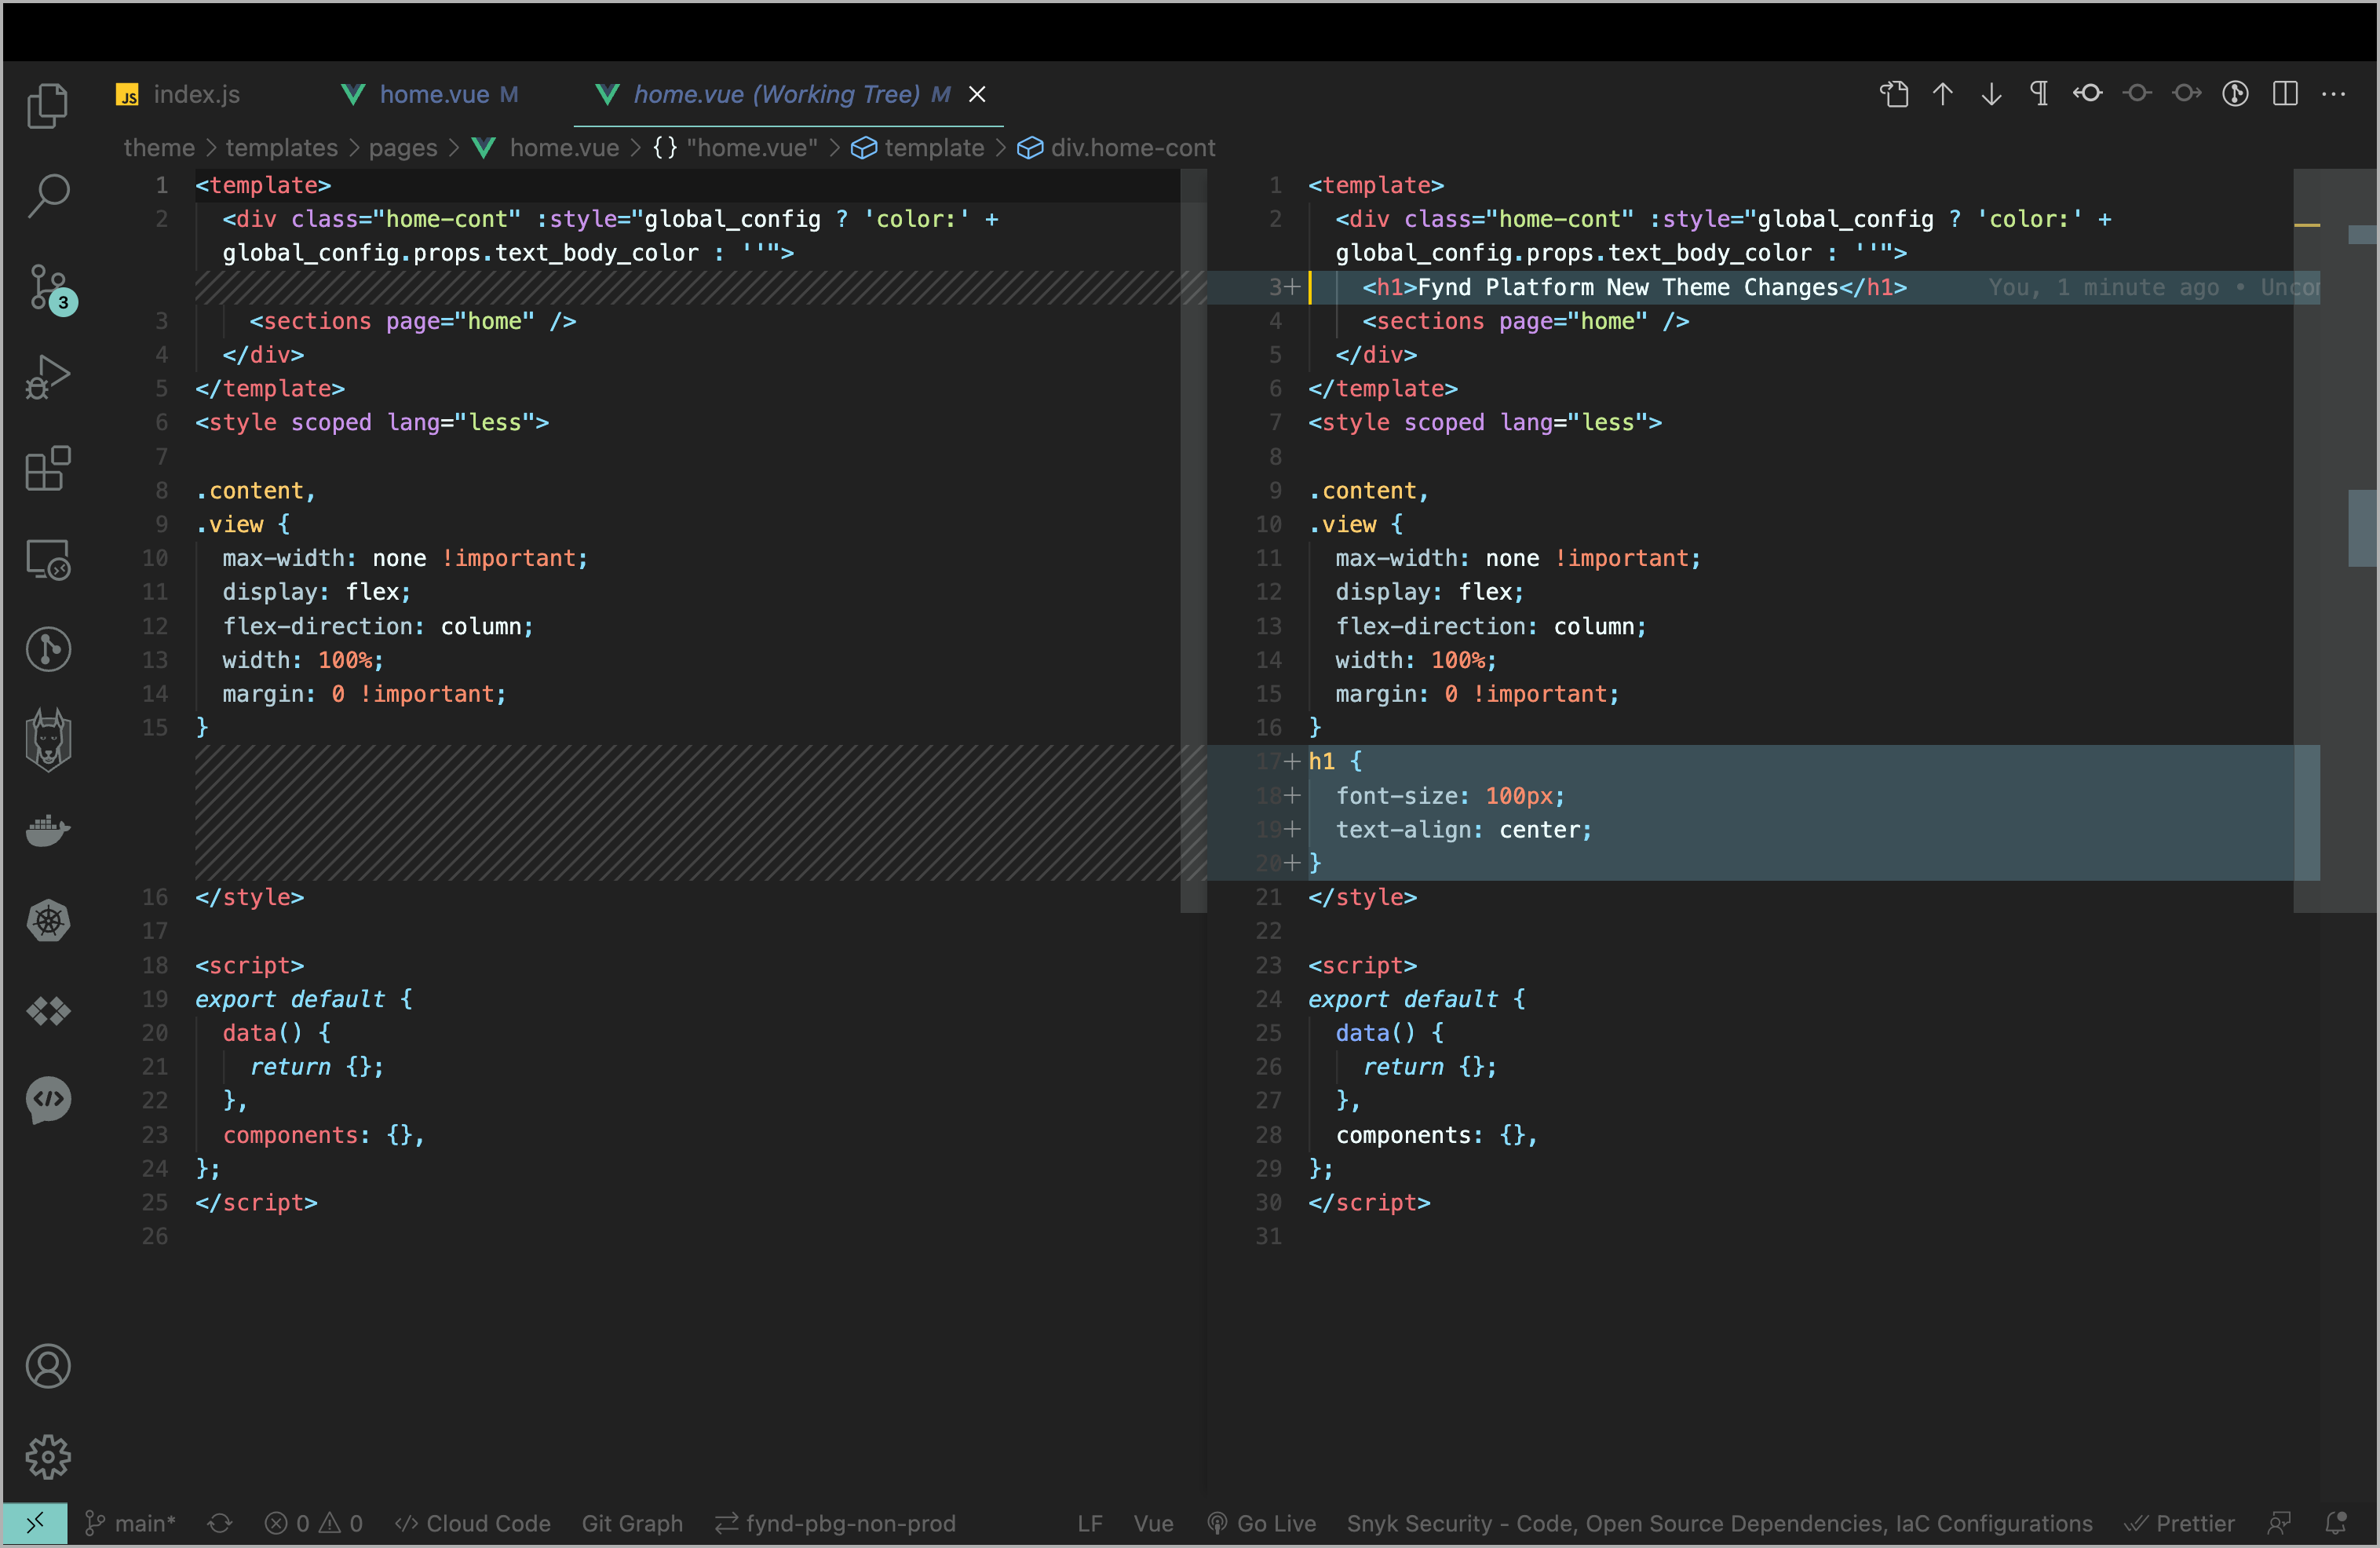
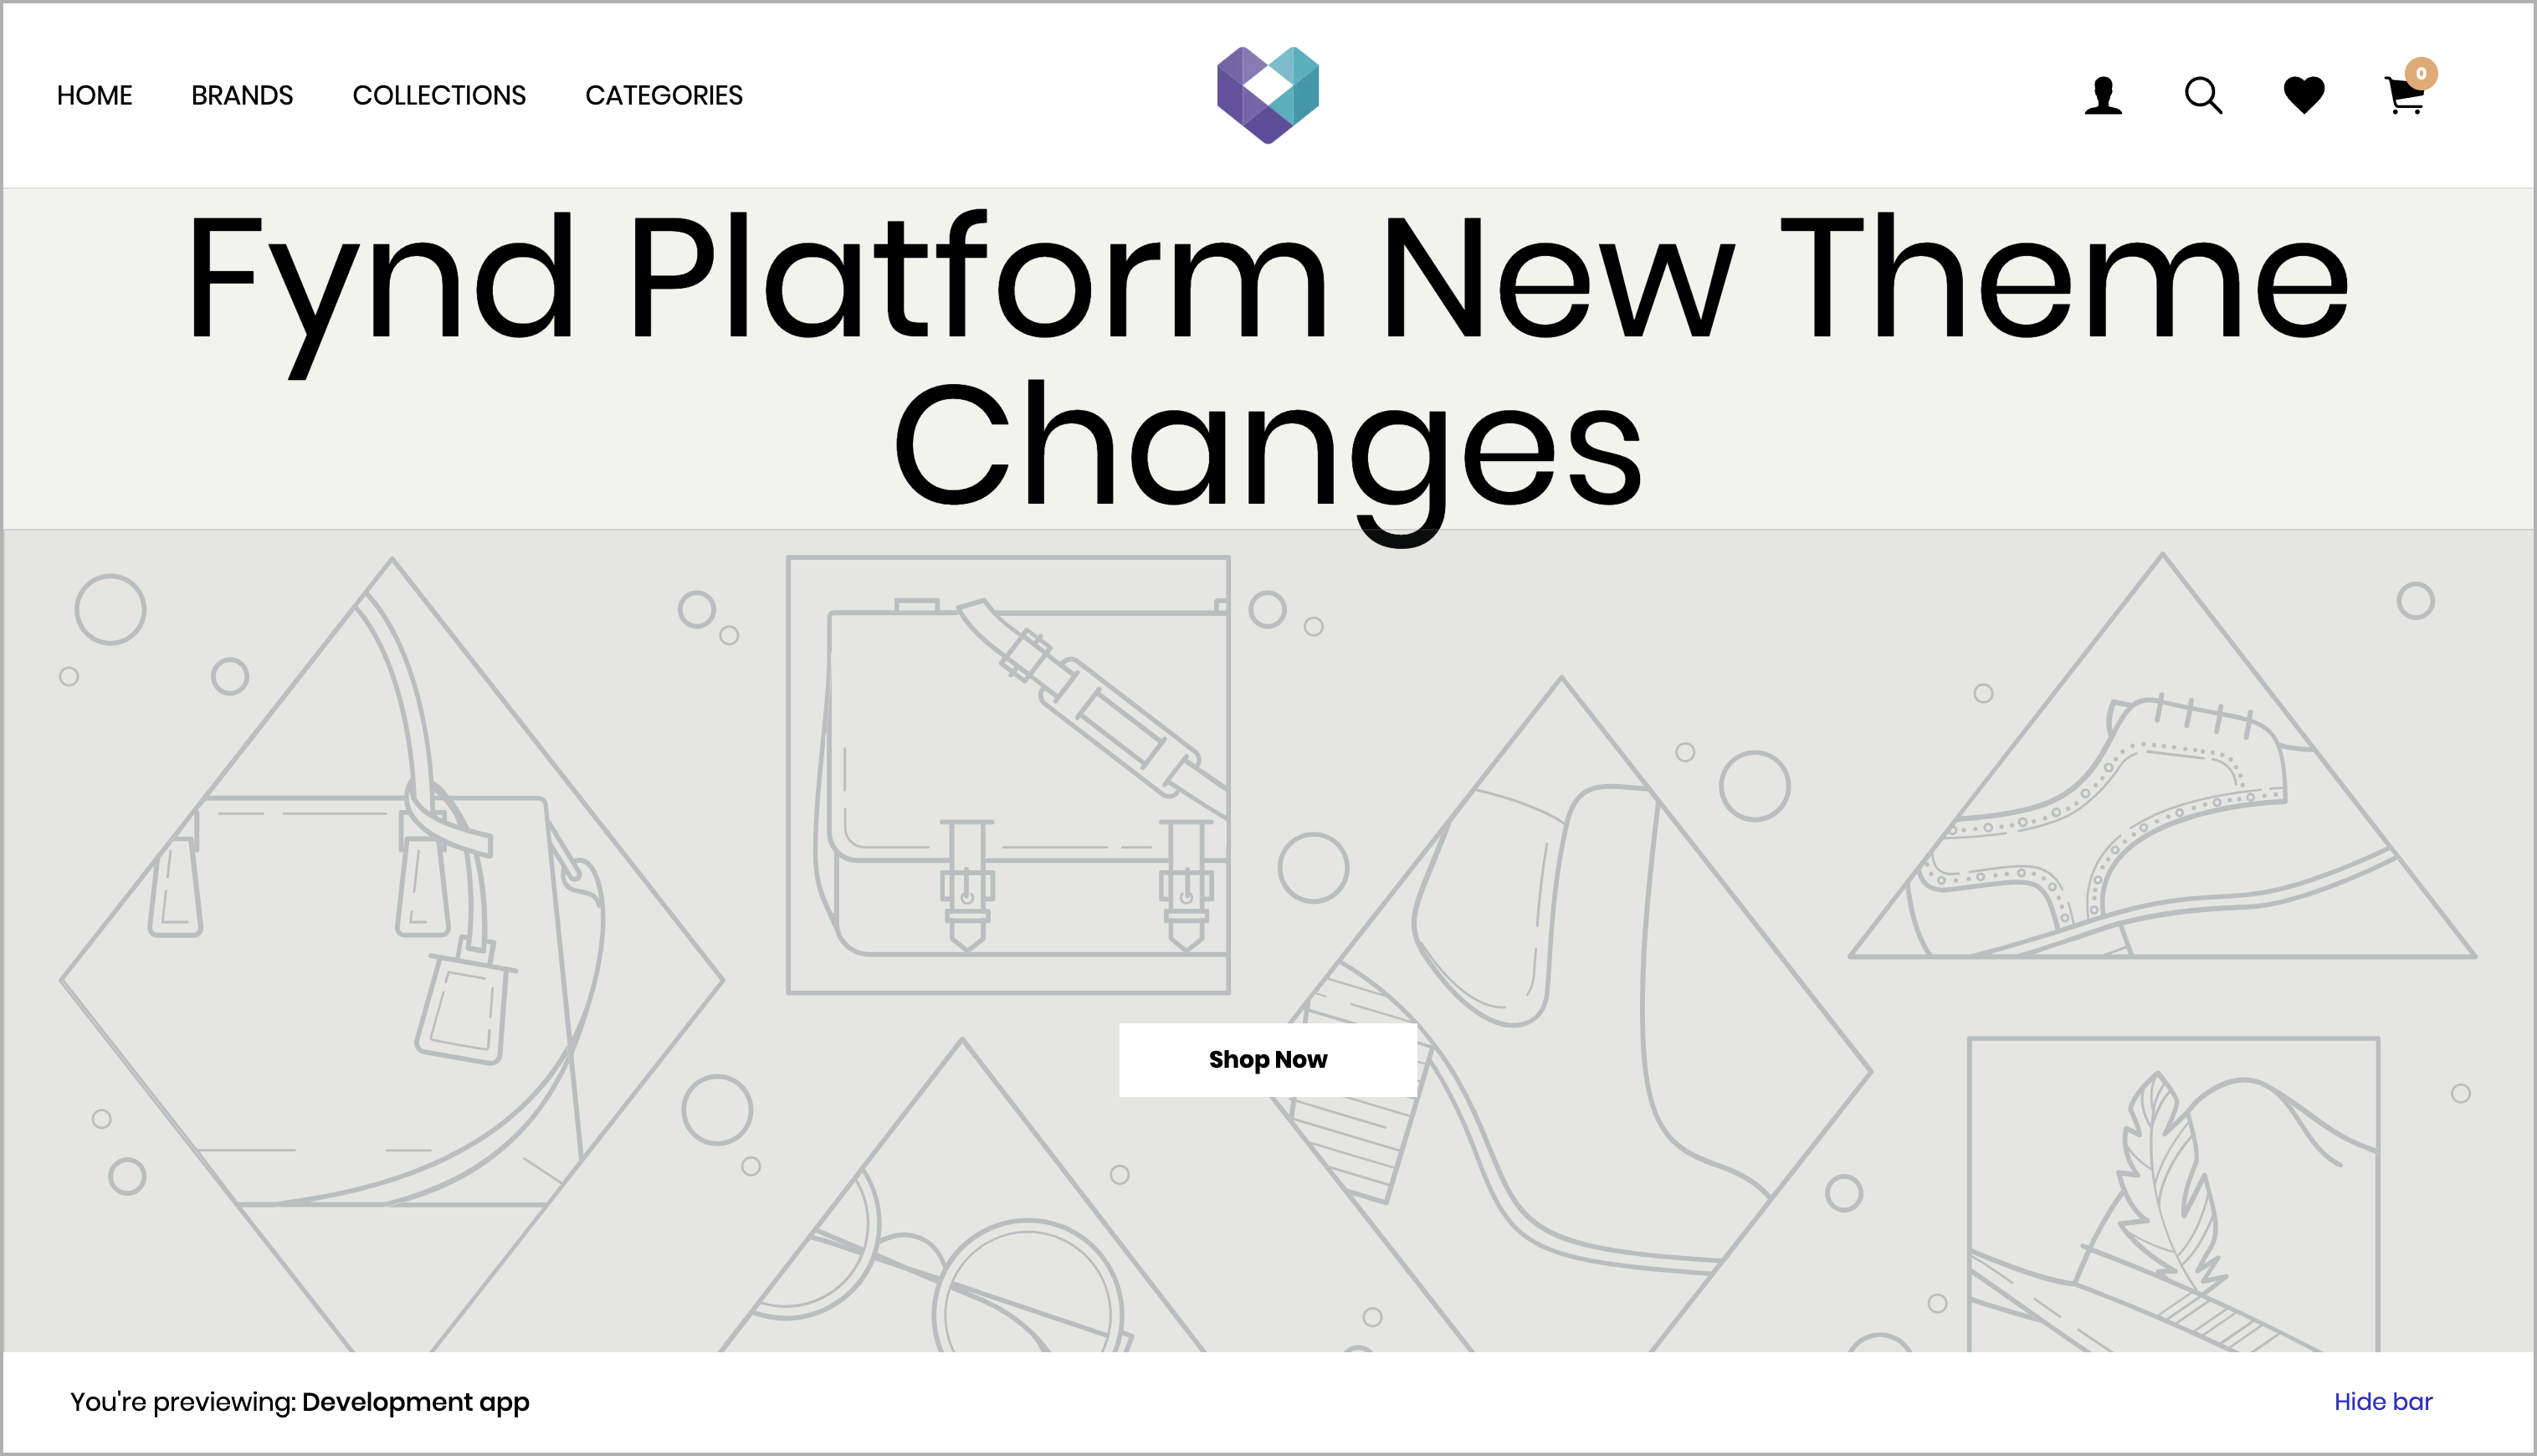
You can only preview the changes locally if the theme is not synced.
Sync the Theme Changes
If you are already familiar with editing the theme and previewing it locally, you can proceed. Otherwise, please refer to the previous section on Theme Dev Documentation: Create a Theme.
Before syncing any theme changes to the application, ensure that the changes are working correctly in the local preview.
Step 1: Sync the Theme
- Make sure you are inside the directory of the specific theme (theme-name) before running the following command to sync the theme:
fdk theme sync
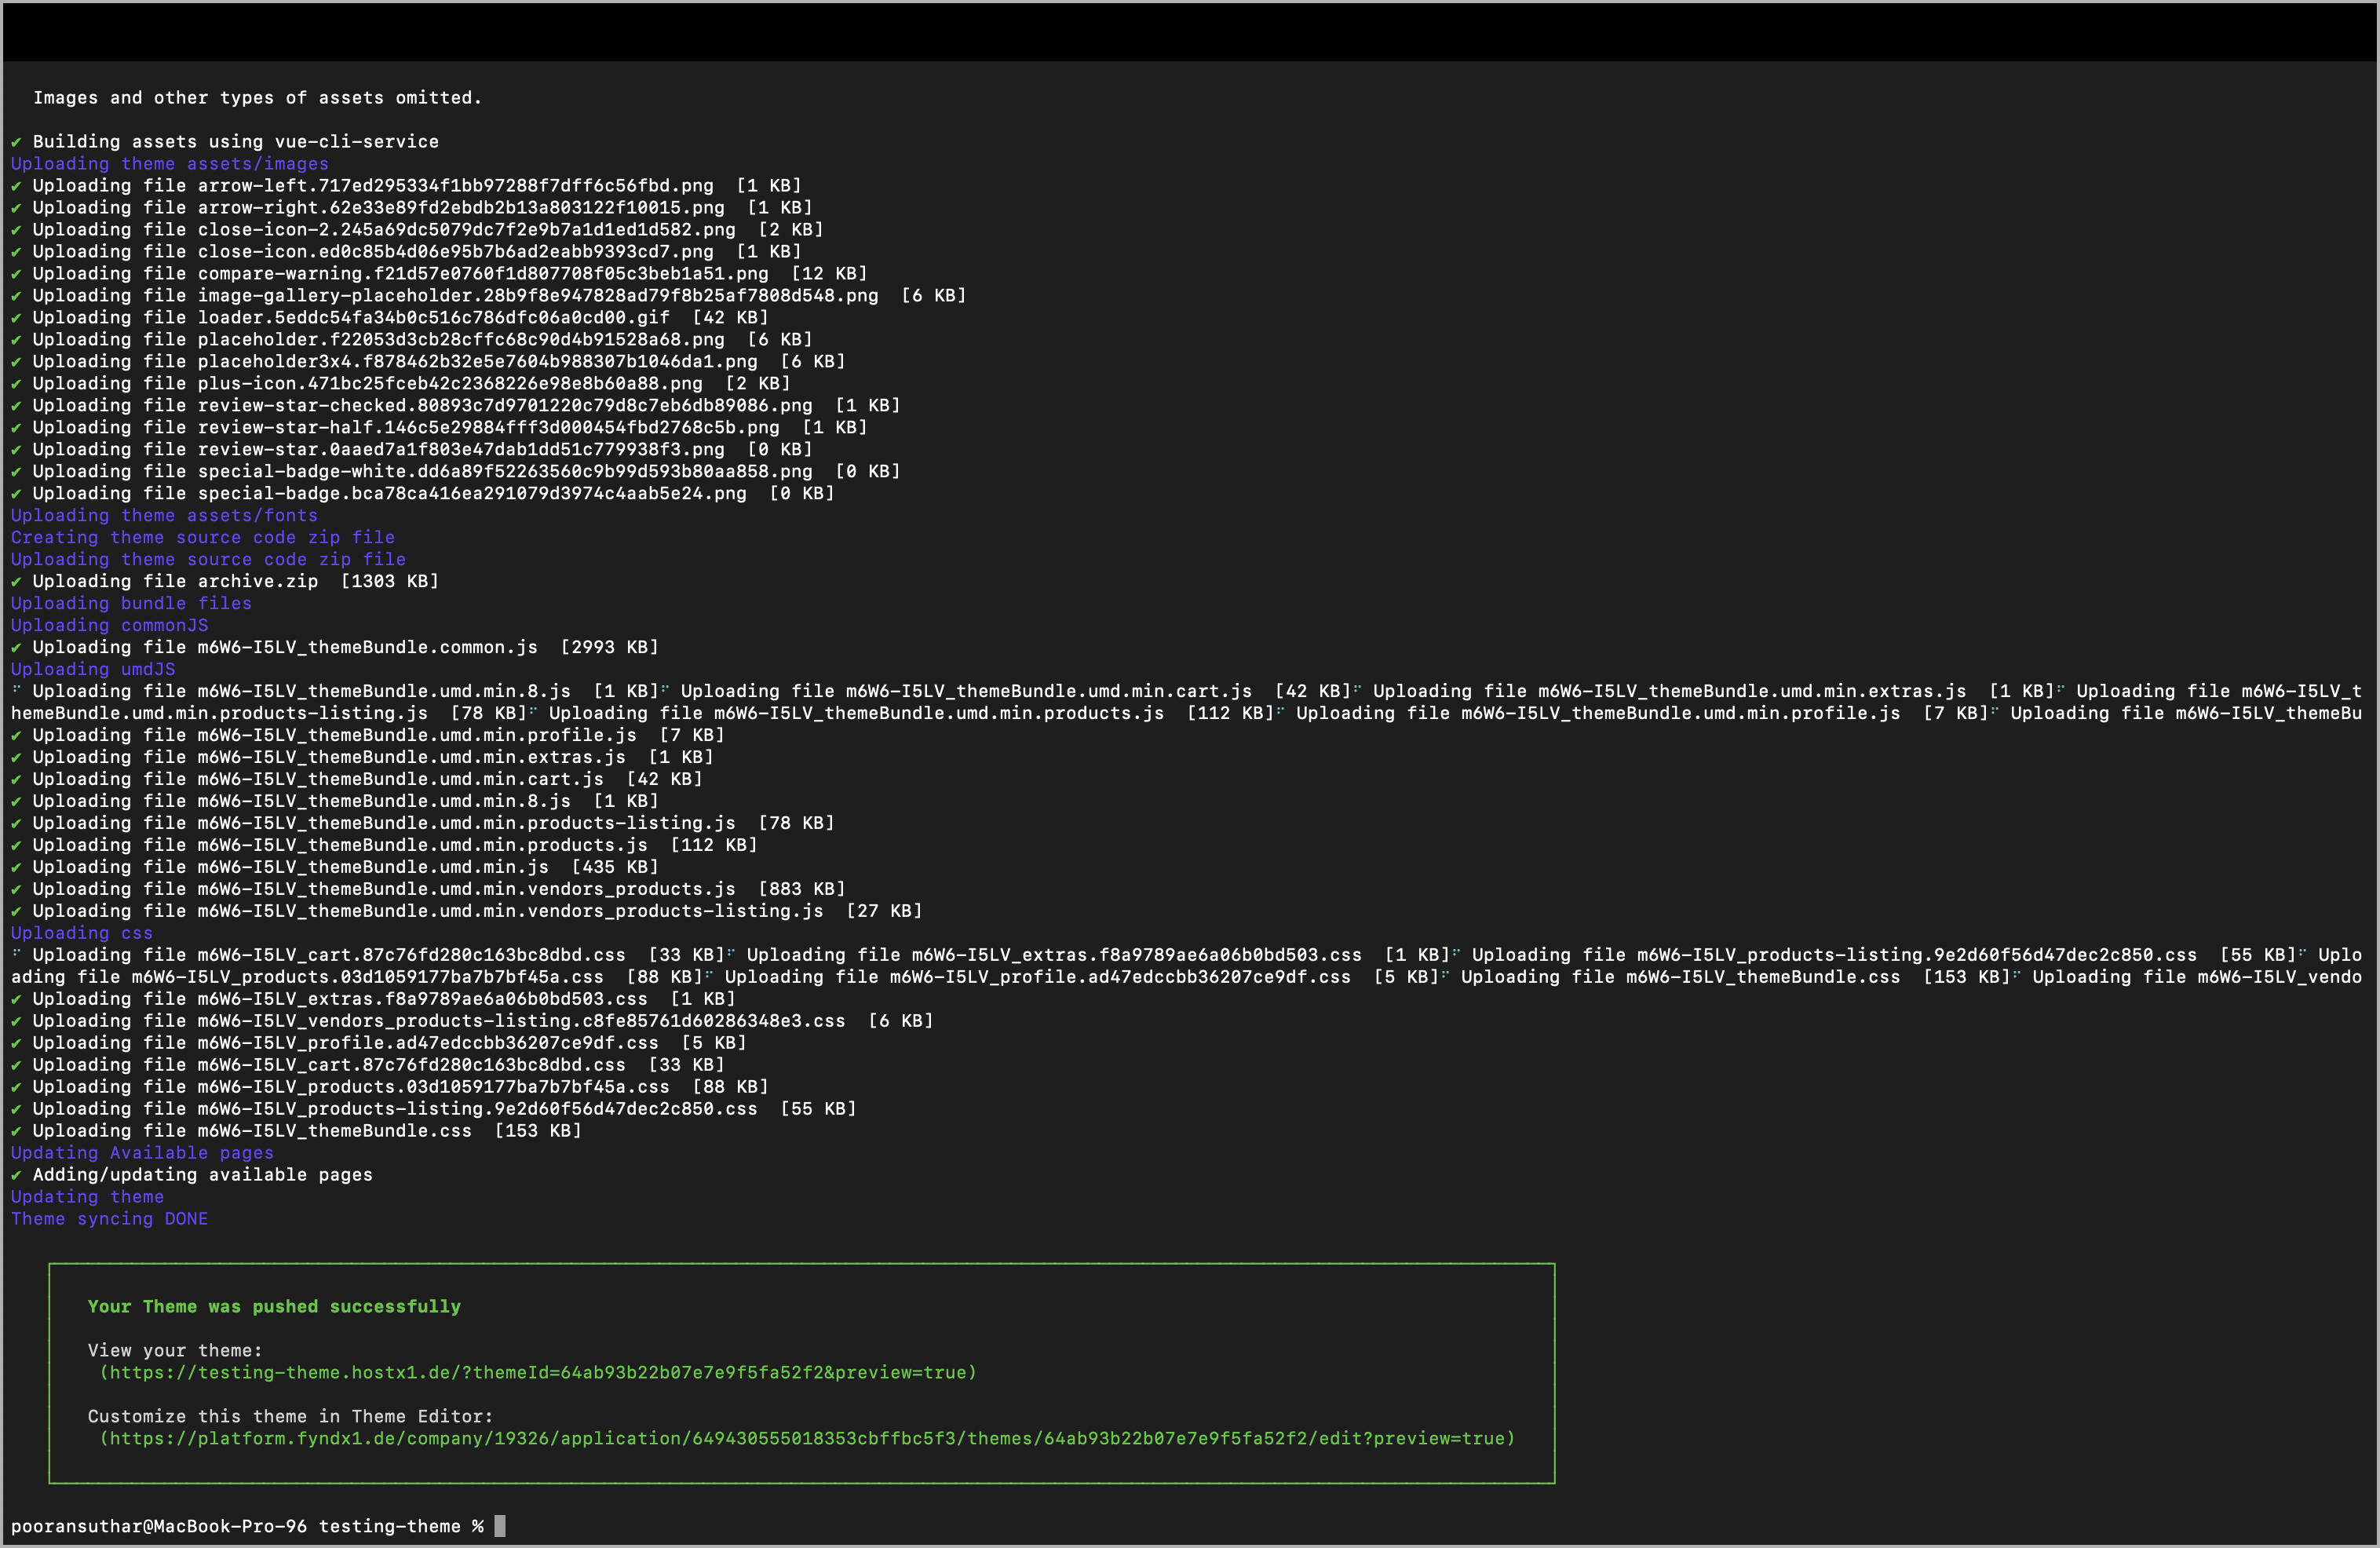
- If the command fails, there may be an issue with the code. Fix any errors and re-run the command.
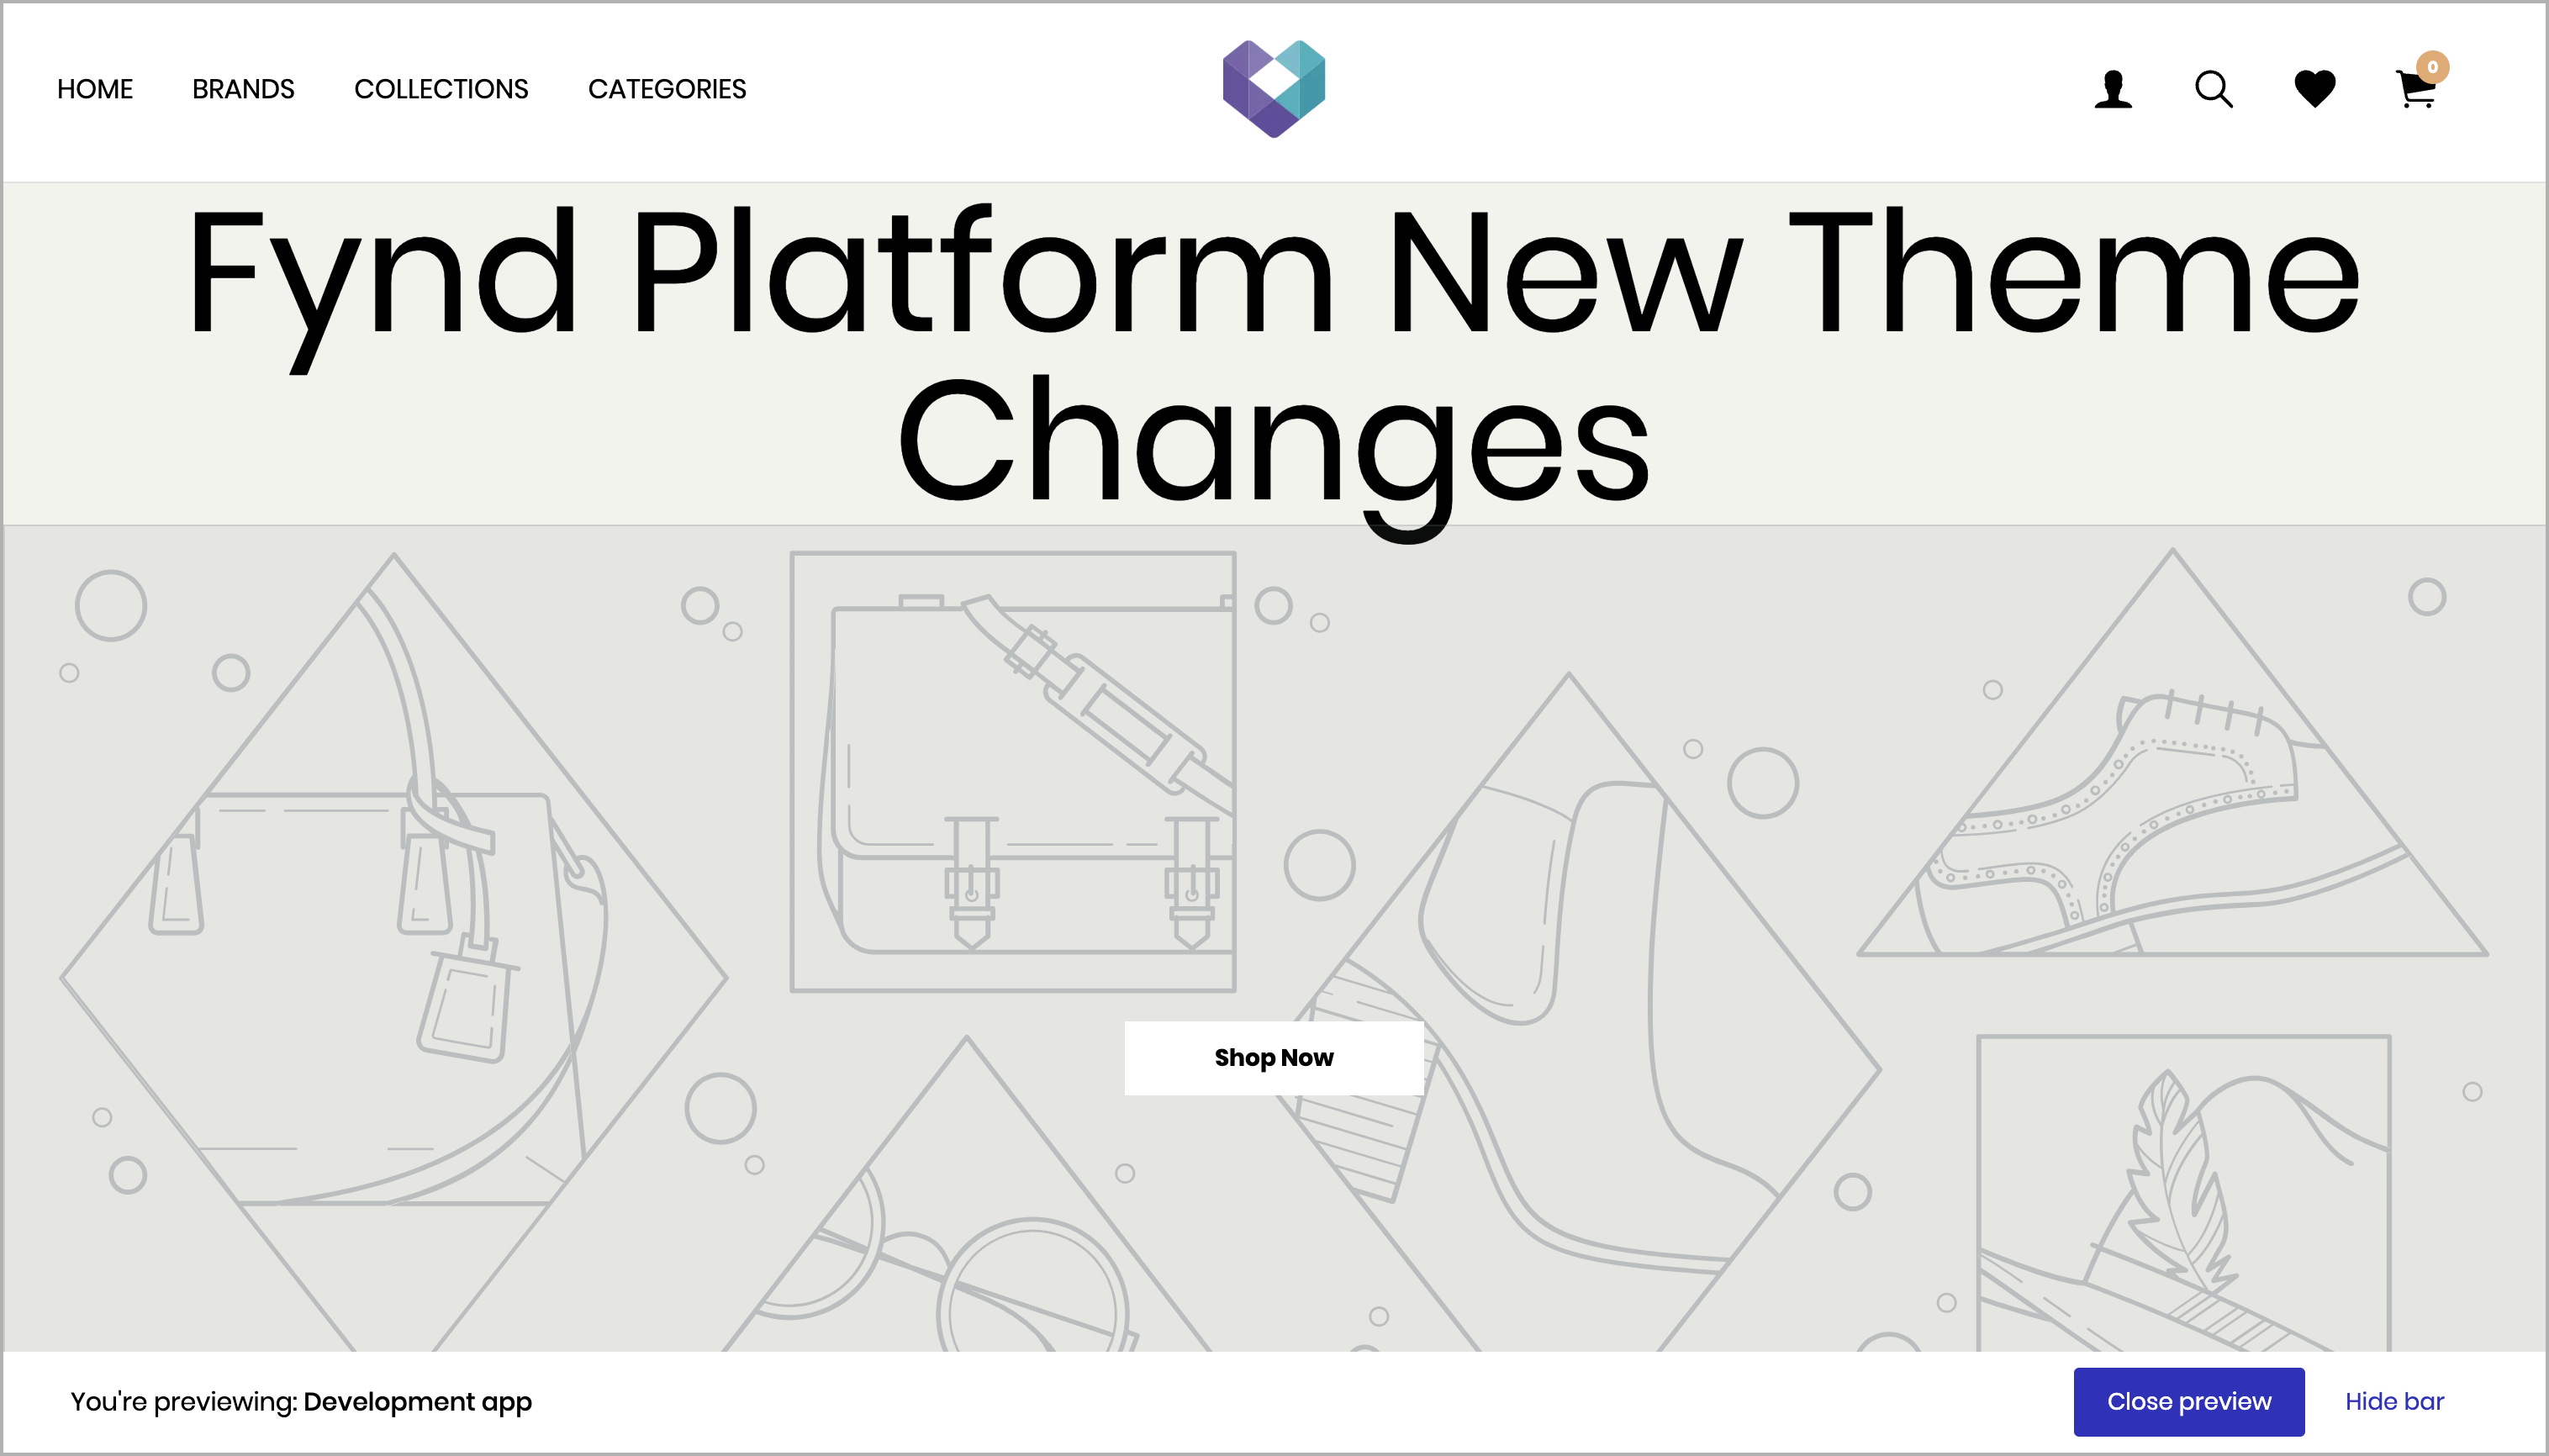
- After the theme sync command is completed, verify the changes by running the following command:
fdk theme open
- This command will redirect you to the live theme preview page of the application, where you can see the applied changes.
Submit a Theme (Marketplace)
Before attempting to submit a theme to the marketplace, ensure that the steps mentioned in Theme Dev Documentation: Create a Theme are successfully completed on the application.
Step 1: Create a Theme Package
- In the theme directory, run the following command to create a package zip file of the theme to be uploaded on the partner panel:
fdk theme package
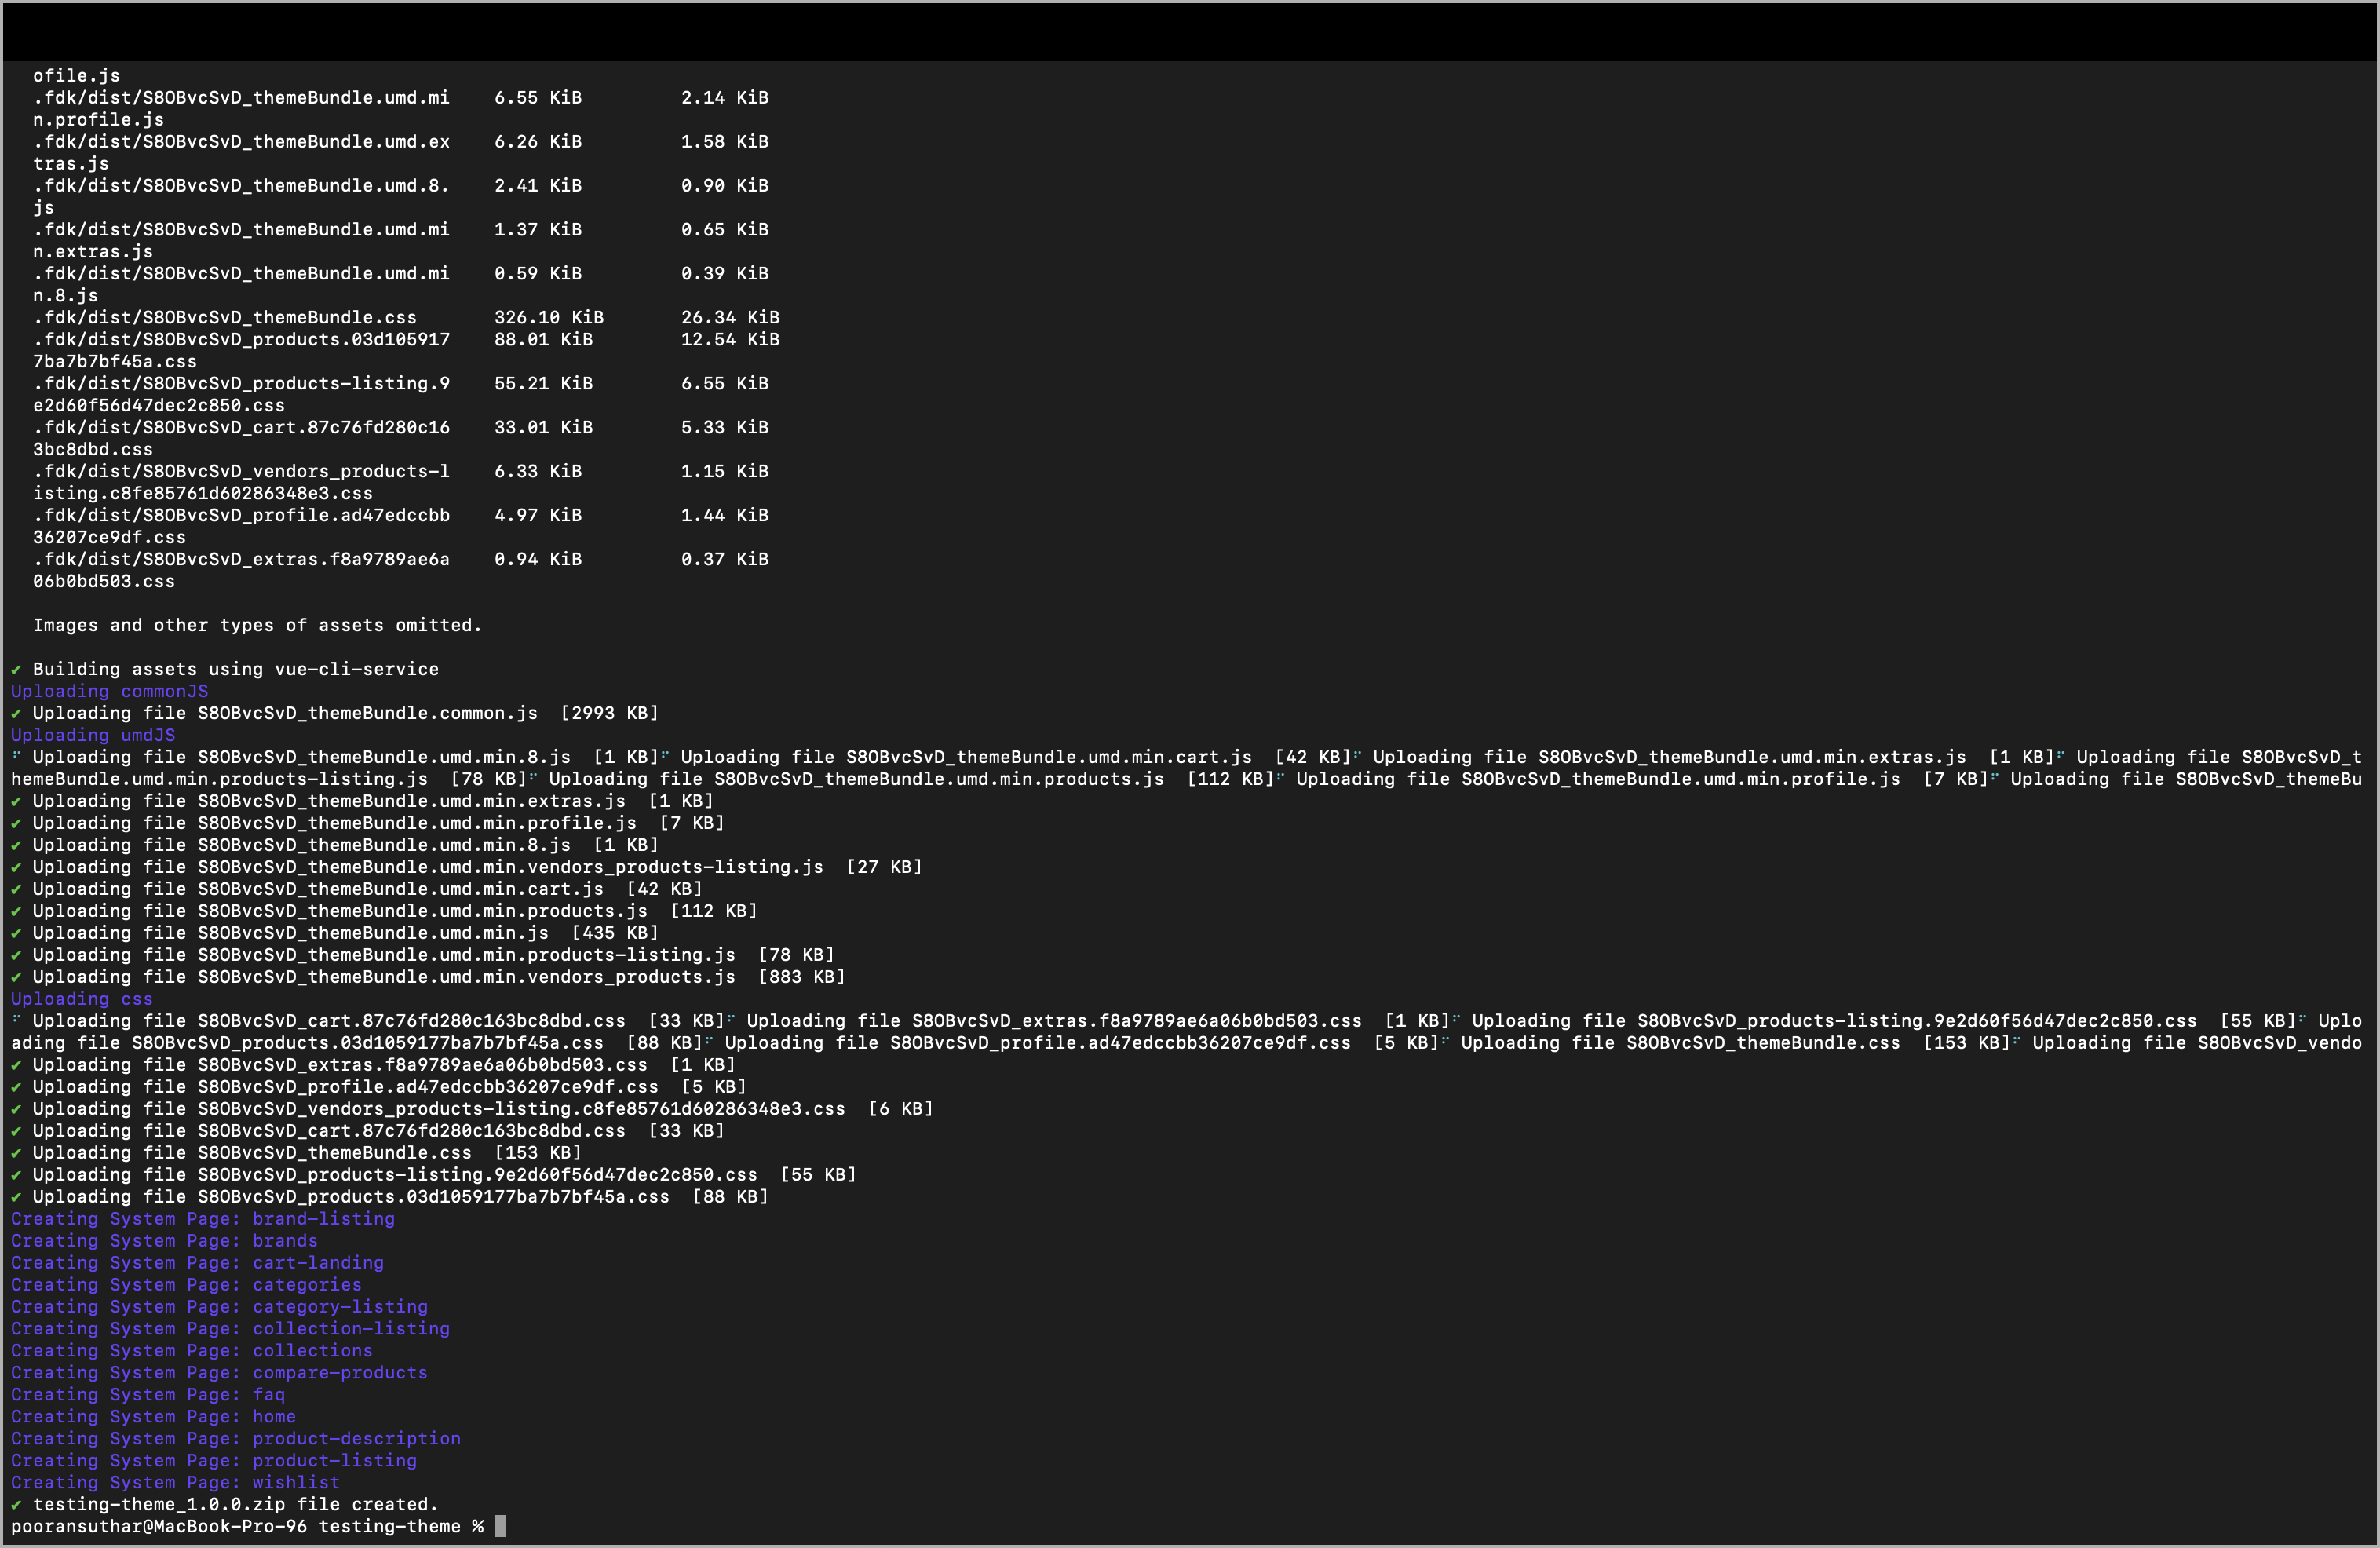
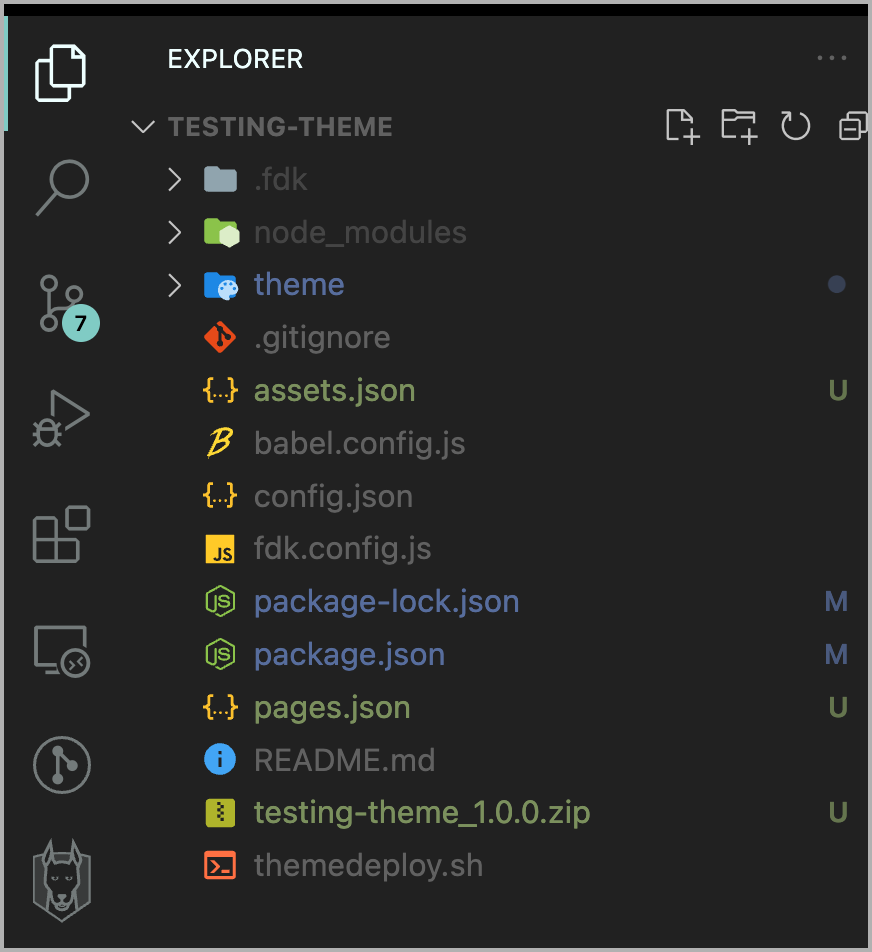
- Inside the theme folder directory, you will find a zip file named after your theme-name and version.
- Once the theme zip file is created, go to the partner panel within the specific organization.
- Select Themes tab.
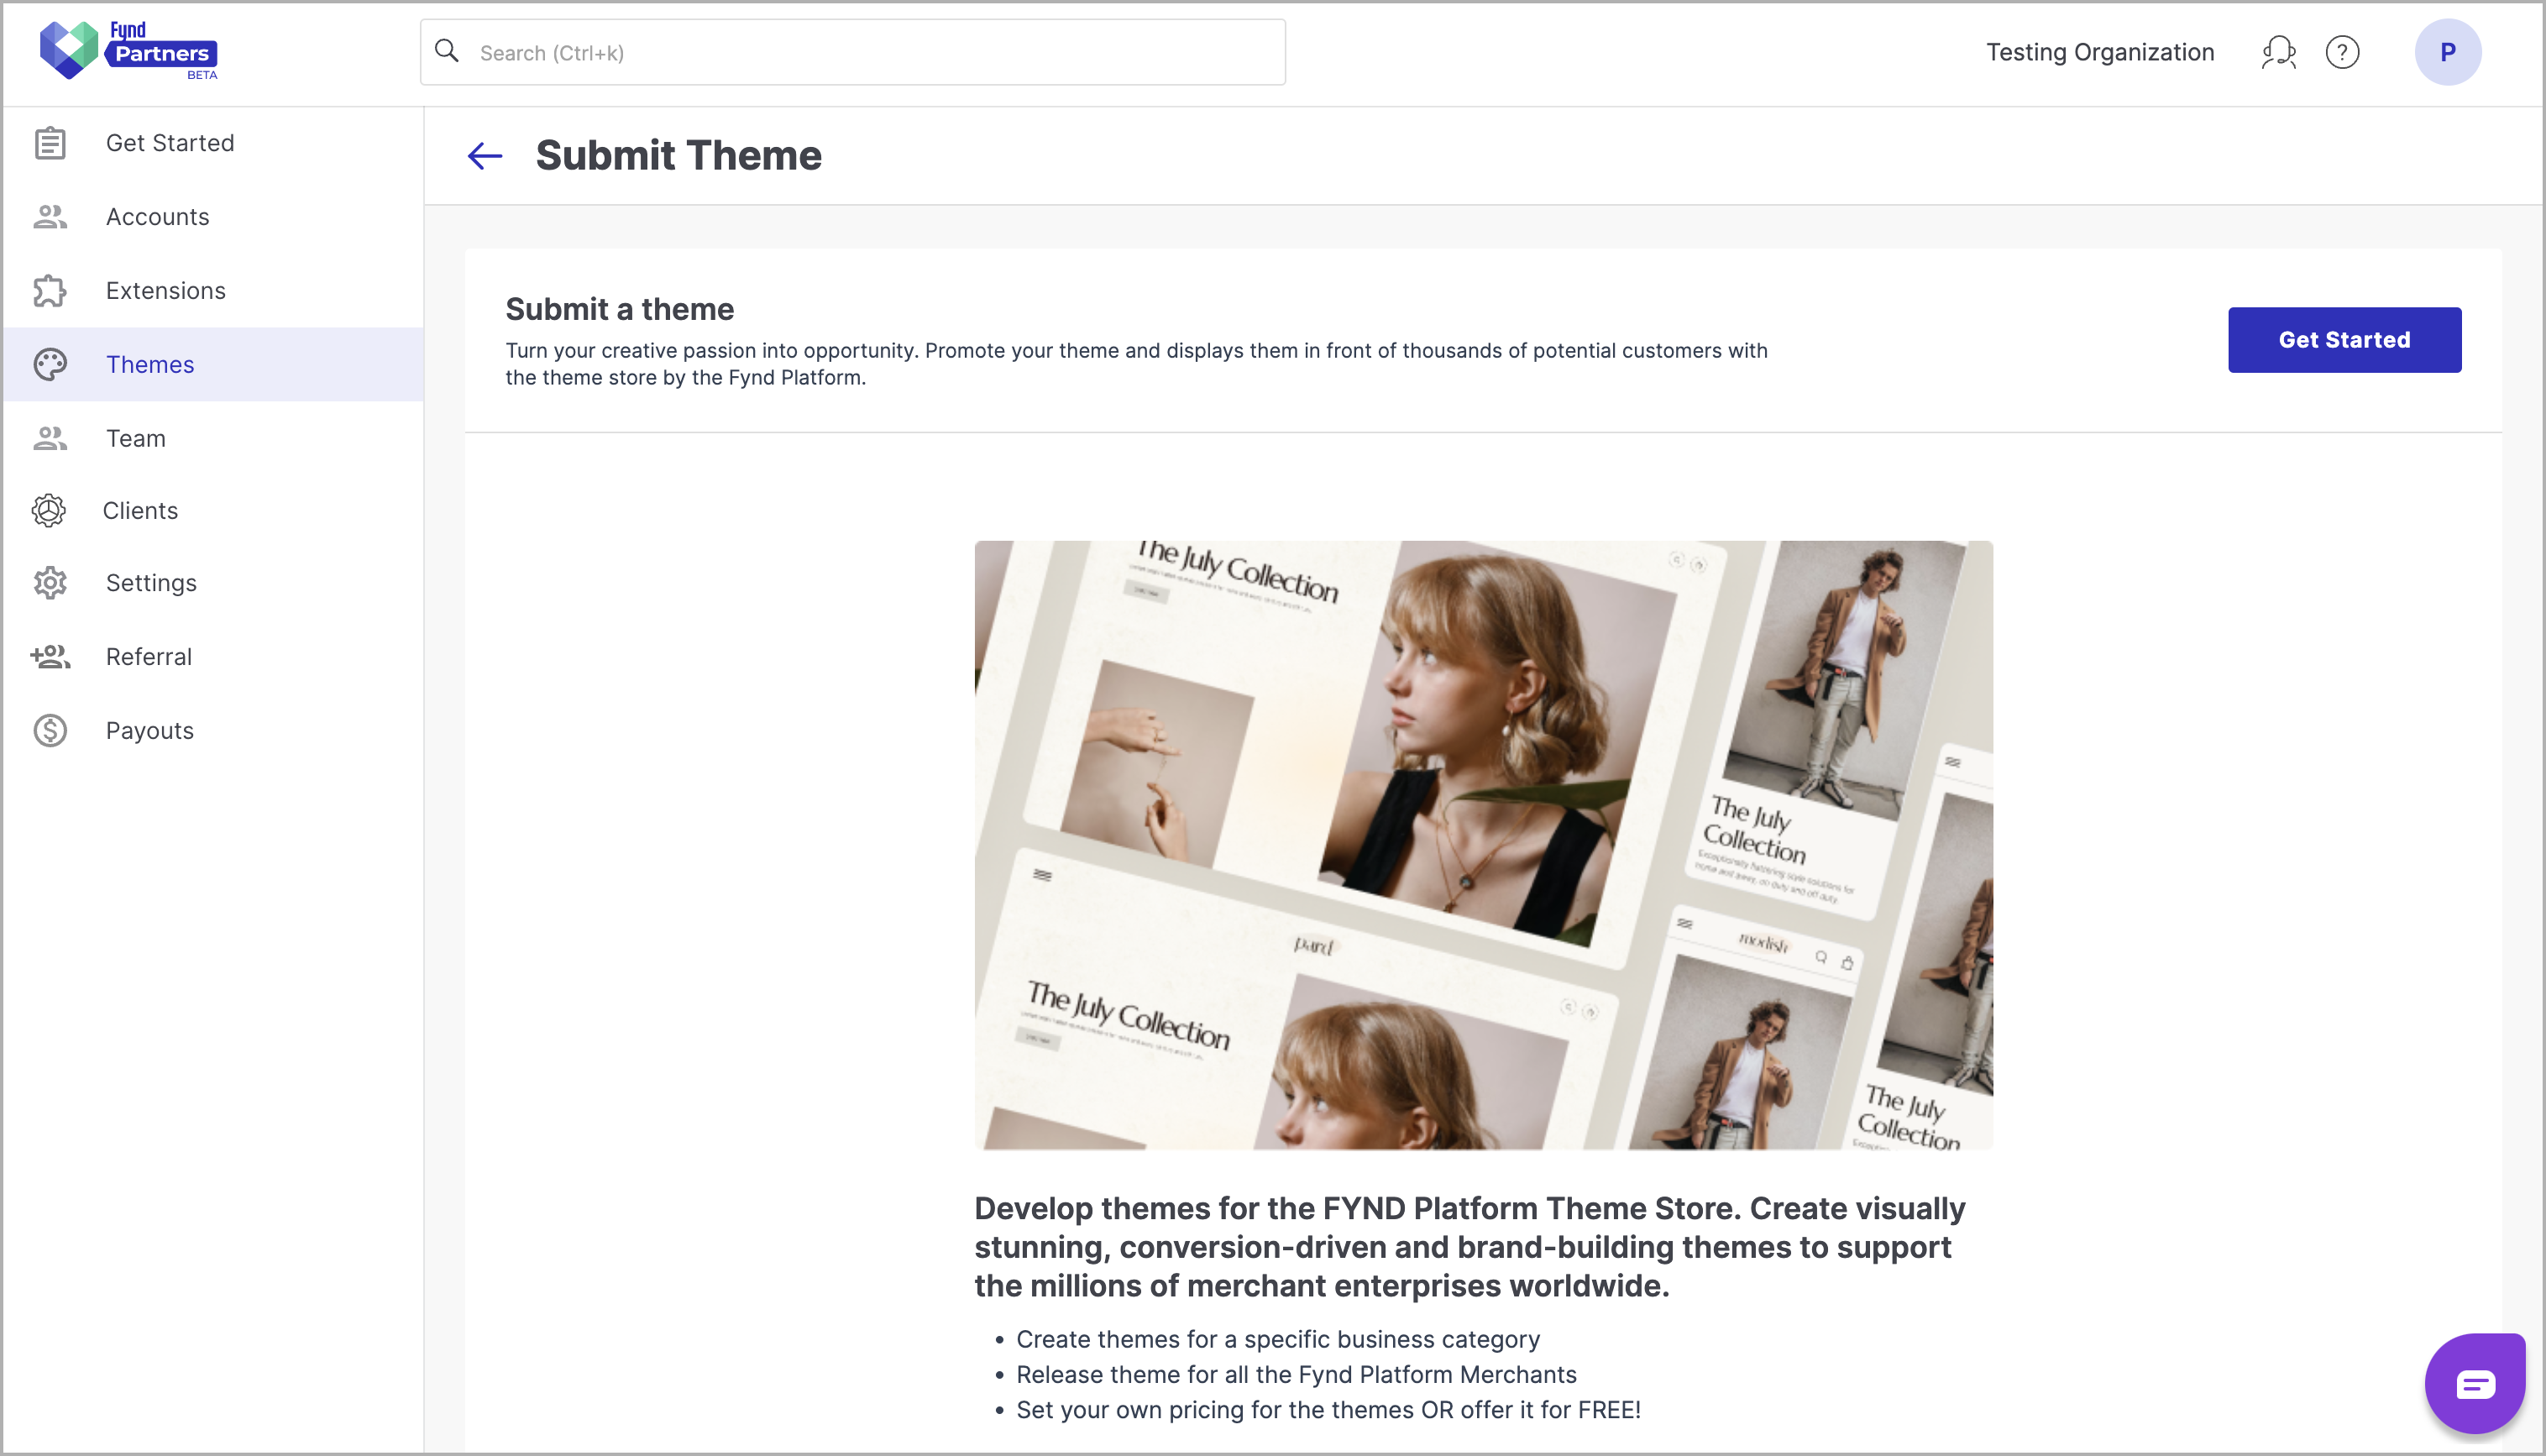
- On the themes page, click Submit Theme to proceed to the theme submission page.
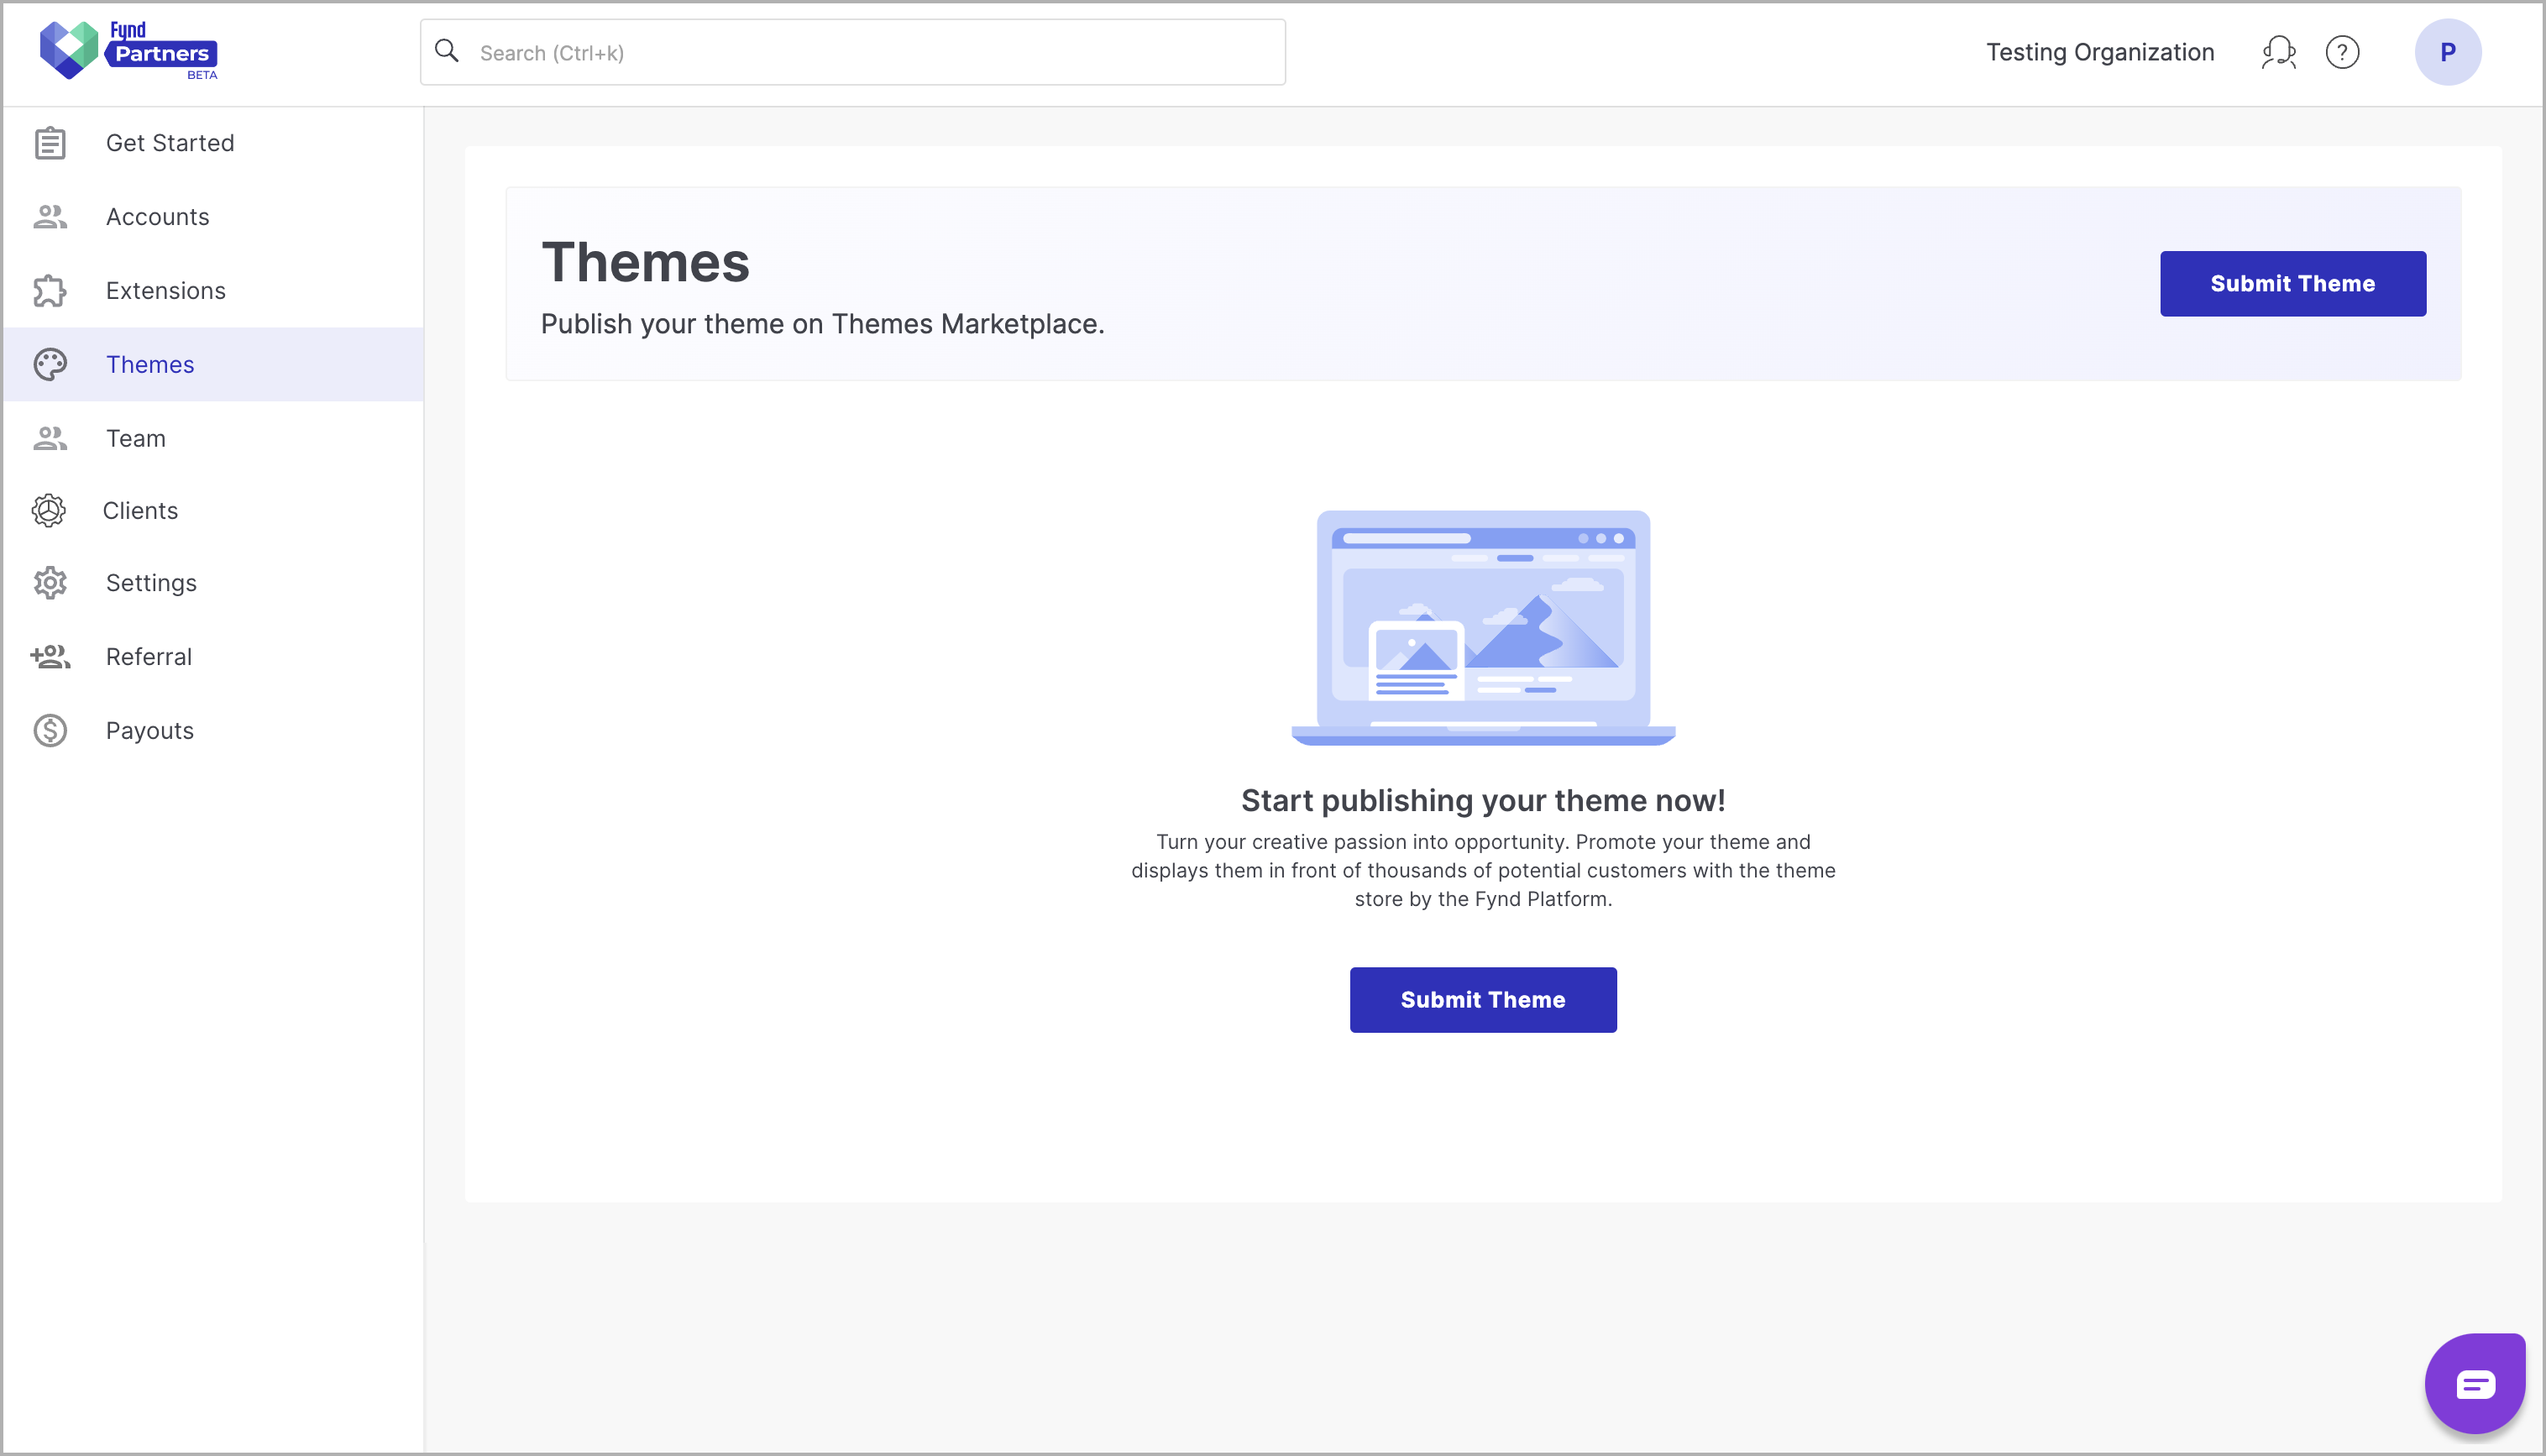
- Click Get Started. Theme Submission Page will appear.
Step 2: Submit Theme Details
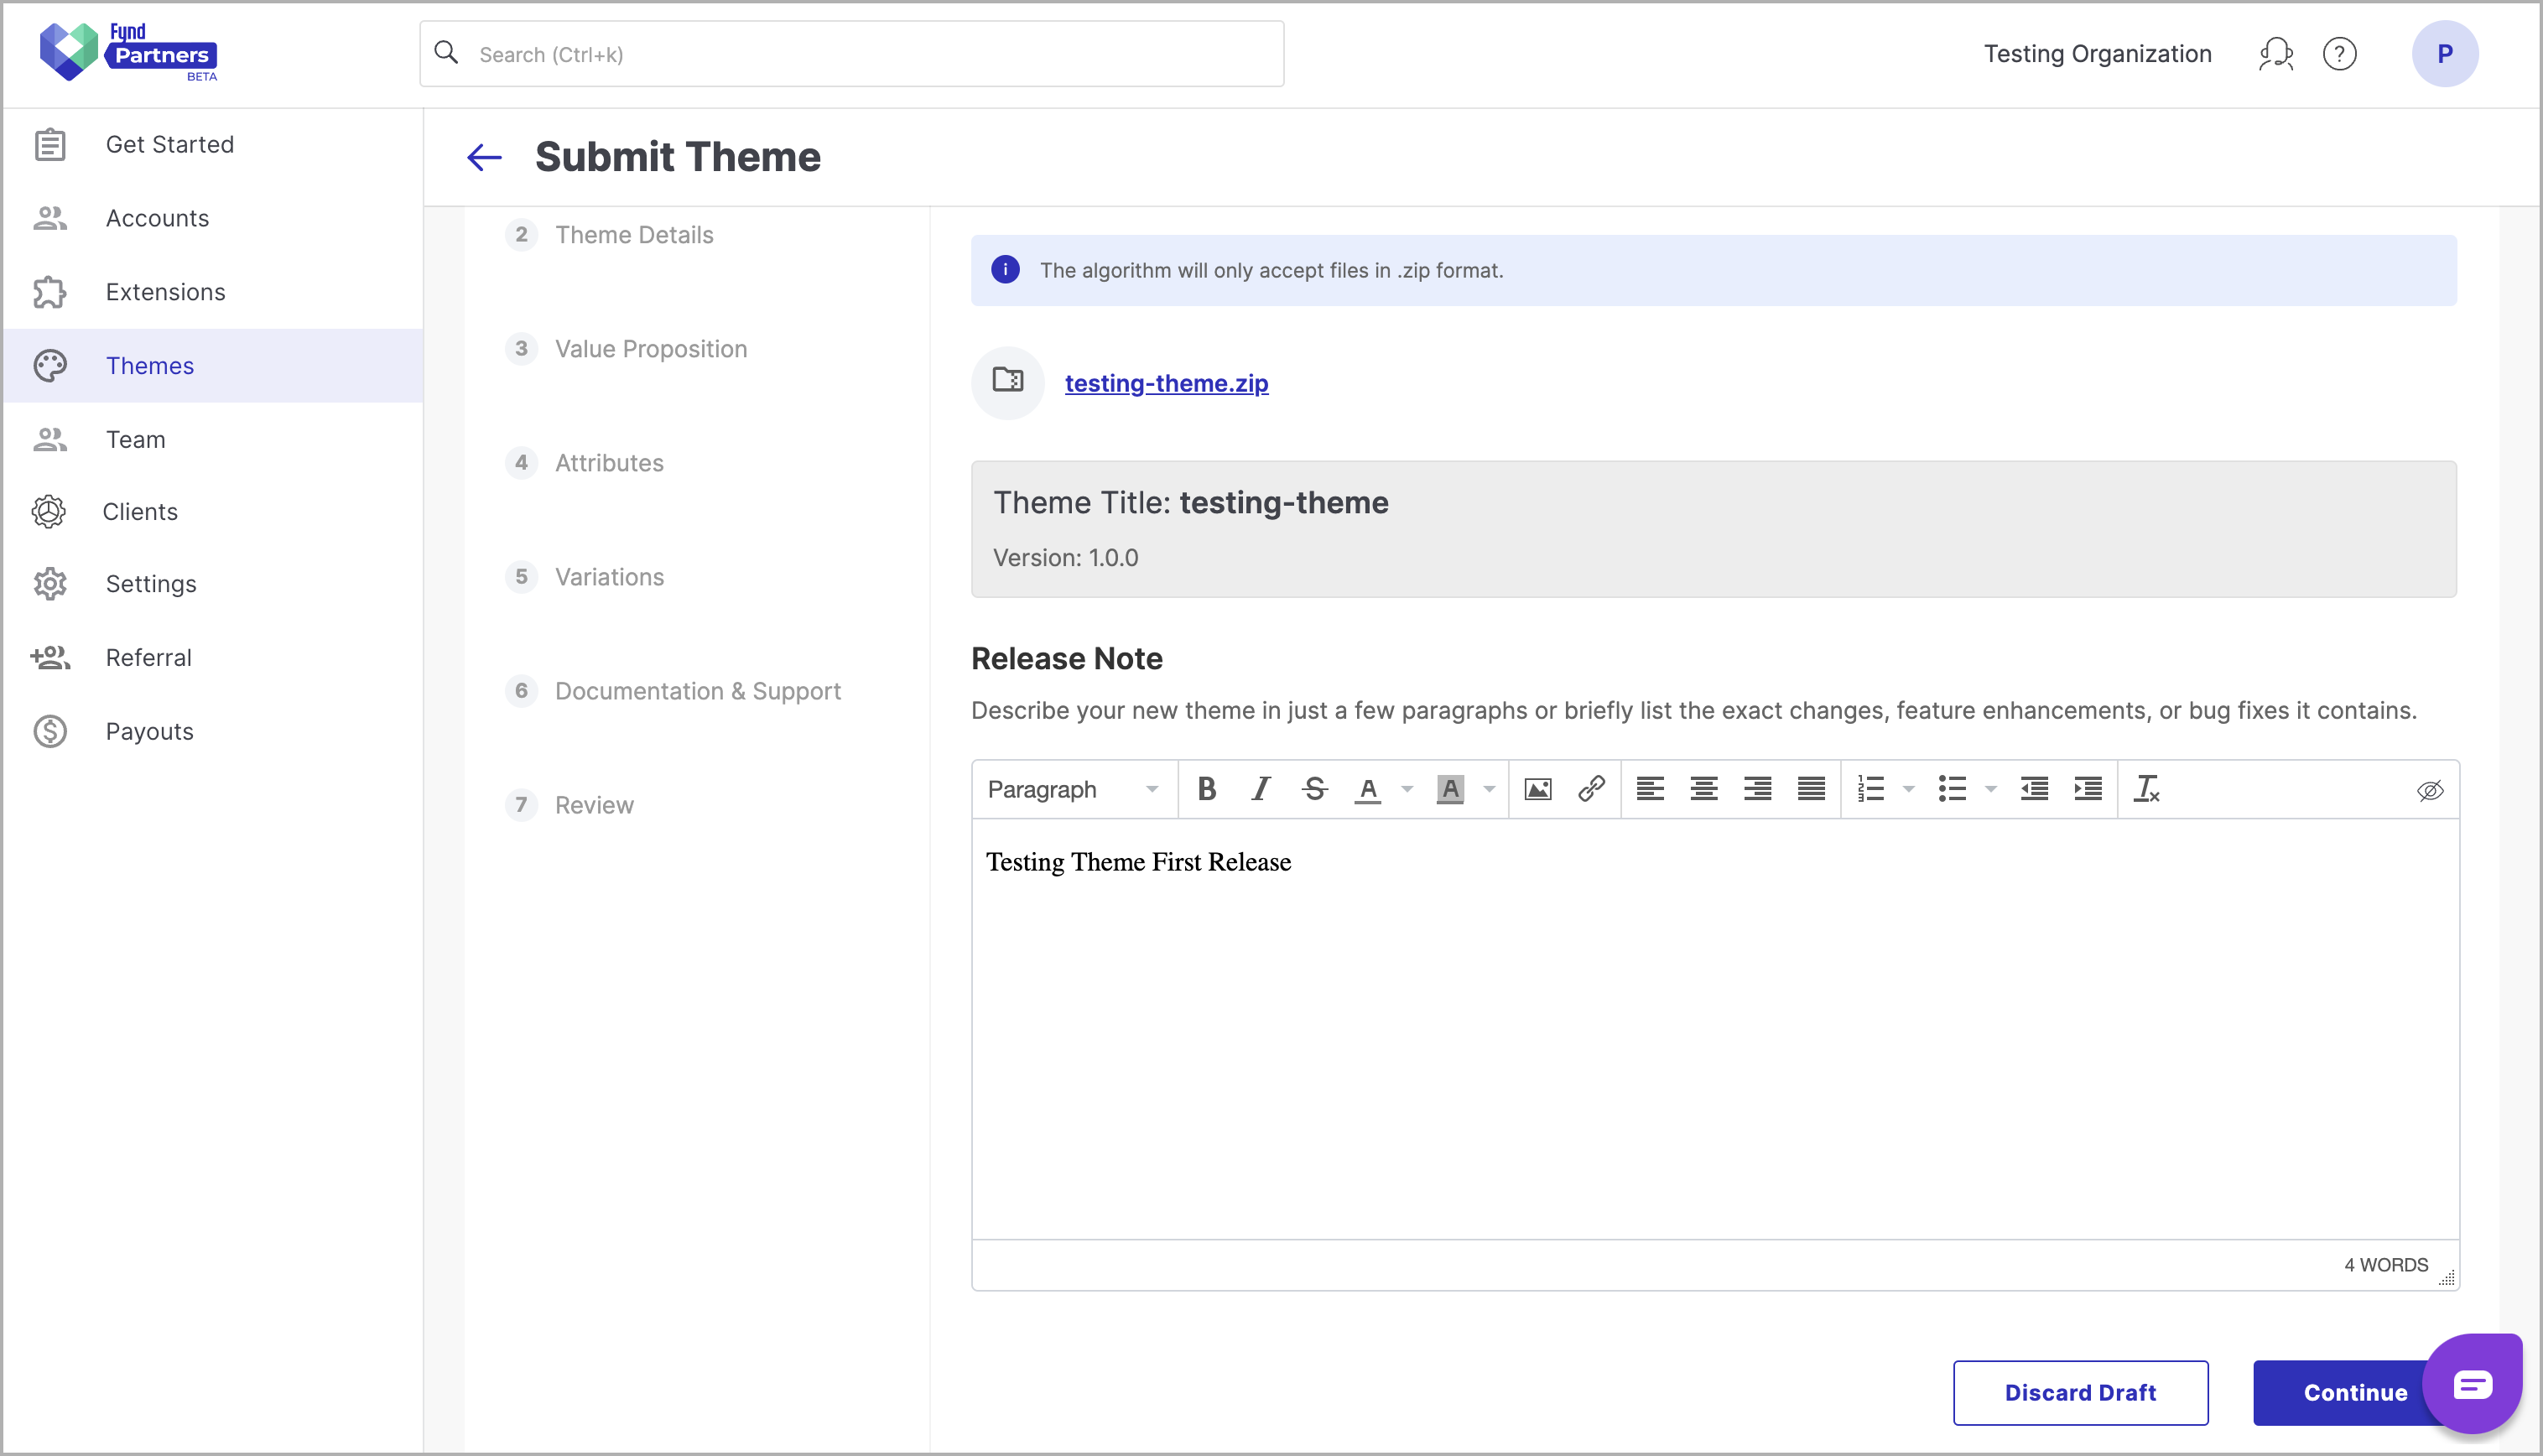
- On the theme submission page, select the theme zip file by uploading it in the Select a Theme File section.
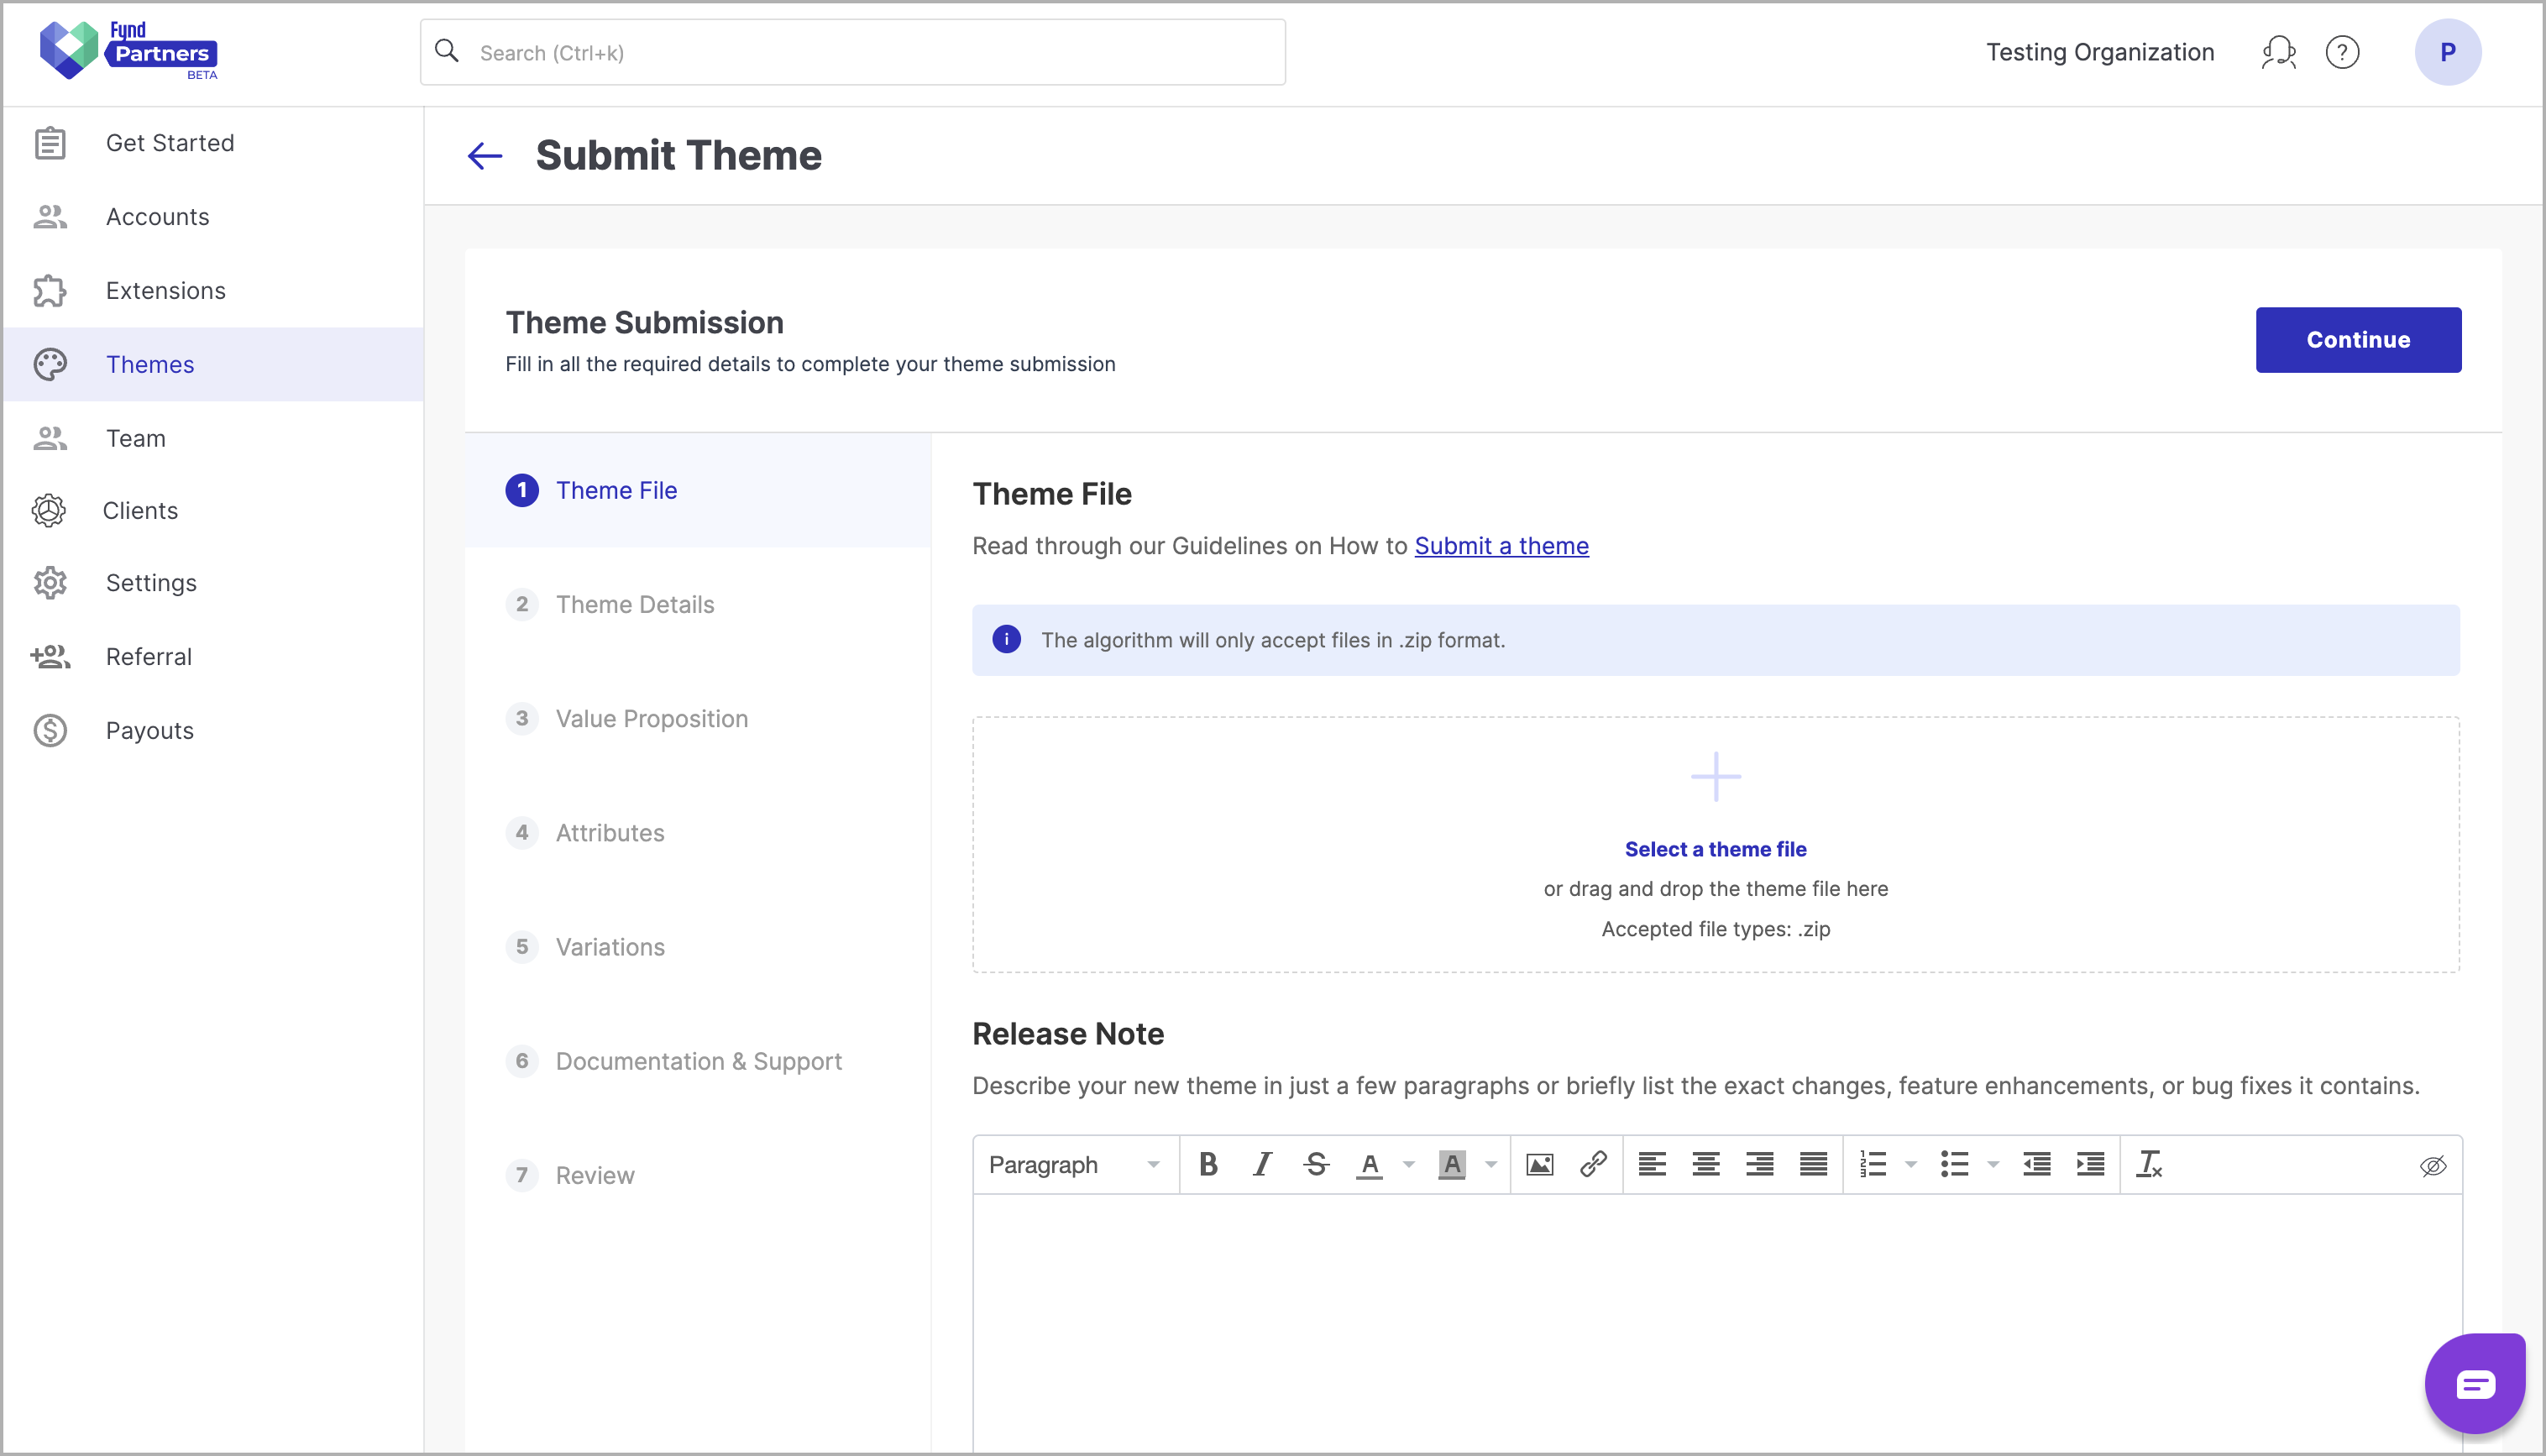
- Add the release note for the newly created theme.
- Click Continue to proceed.
- Follow the subsequent steps that require various details like attributes, variations, etc. Complete all the steps, including the review step, by filling in the necessary information.
- Finally, submit the theme.
- The theme is now sent for review, and it will undergo an approval or rejection process.
- Review our general theme best practices. Our themes are powerful and flexible. To use themes to their full potential, and to create great e-commerce experiences, you should build your theme with a set of principles in mind.