Custom Templates
Vue-based themes will soon be deprecated. Please switch to React-based themes, as all future updates and support will focus exclusively on React.
What is a custom template?
Custom templates are Vue templates that you can use in your theme if none of the available system pages meet your requirements. These templates are mounted at /c/page-name routes. An instance of the application SDK is available in case the template needs to display any data in the UI.
Creating a custom template
Inside your theme/custom-templates, folder create a new VUue file, for example, notifications.vue. Now create an index.js file in the theme``/custom-templates folder. Import the notification component inside this file. You need to now default export an object with the list of all components.
Use the below snippet as a reference:
import Notification from './notification.vue';

export default {
  // mount at /c/notication
  notification: {
    component: Notification,
    meta: {
      header: false,
      footer: false,
    }
  }
}
"The meta object has two keys: 'header' and 'footer.' You can set them as true or false to show/hide the header and footer on your custom page. We have set both to false as we do not want to show the header and footer in our custom template. When serving the site locally, you can view this page at http://localdev.fynd.com:5000/c/notification. The notification part in the route comes from the key in the default exported object."
Nested custom templates
You can have nested custom templates as well. Let’s say we are building a custom settings page where users can view the notifications and display languages. The UI skeleton looks something similar to the one shown below:
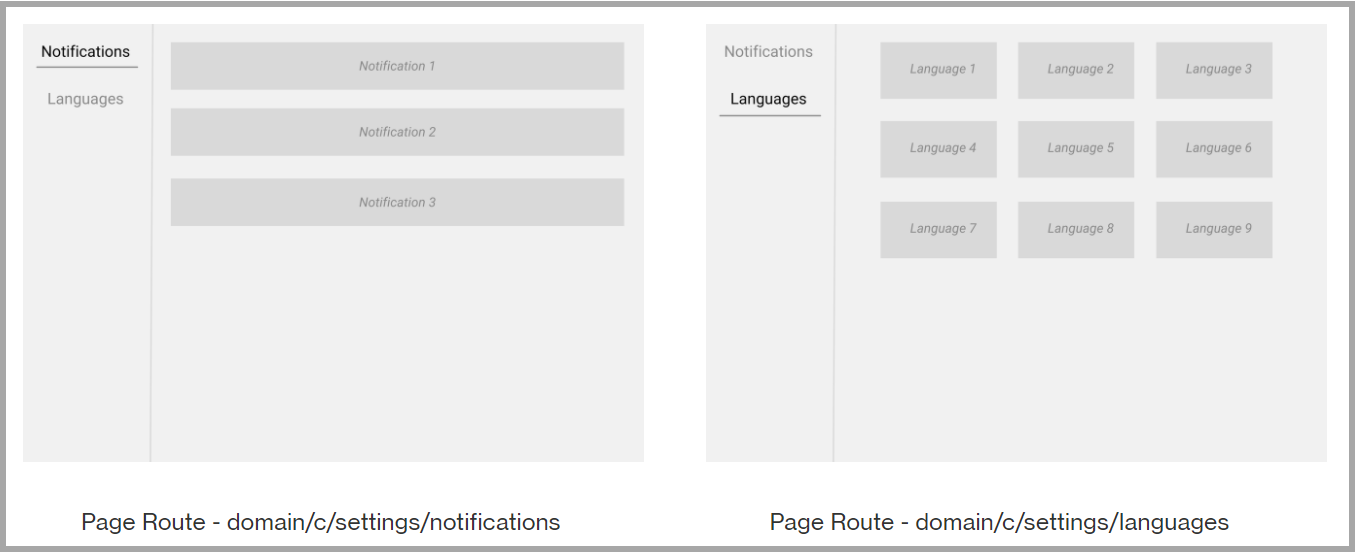
You can also have nested custom templates. For instance, let's consider building a custom settings page where users can view notifications and display languages. The UI skeleton resembles the example shown below:
The settings.vue component will have router-view component to show the child components. Example code snippet:
<div className="settings-container"`>`
    <router-view></router-view>
</div>
Then you can code your notification and language components as per your UI. Now add the index.js file.
export default {
  "settings": {
    component: Settings,
    meta: {
      header: false,
      footer: false,
    },
    children: {
      notifications: {
        component: Notification,
        meta: {
          header: false,
          footer: false
        }
      },
      languages: {
        component: Language,
        meta: {
          header: false,
          footer: false
        }
      }
    }
  }
}